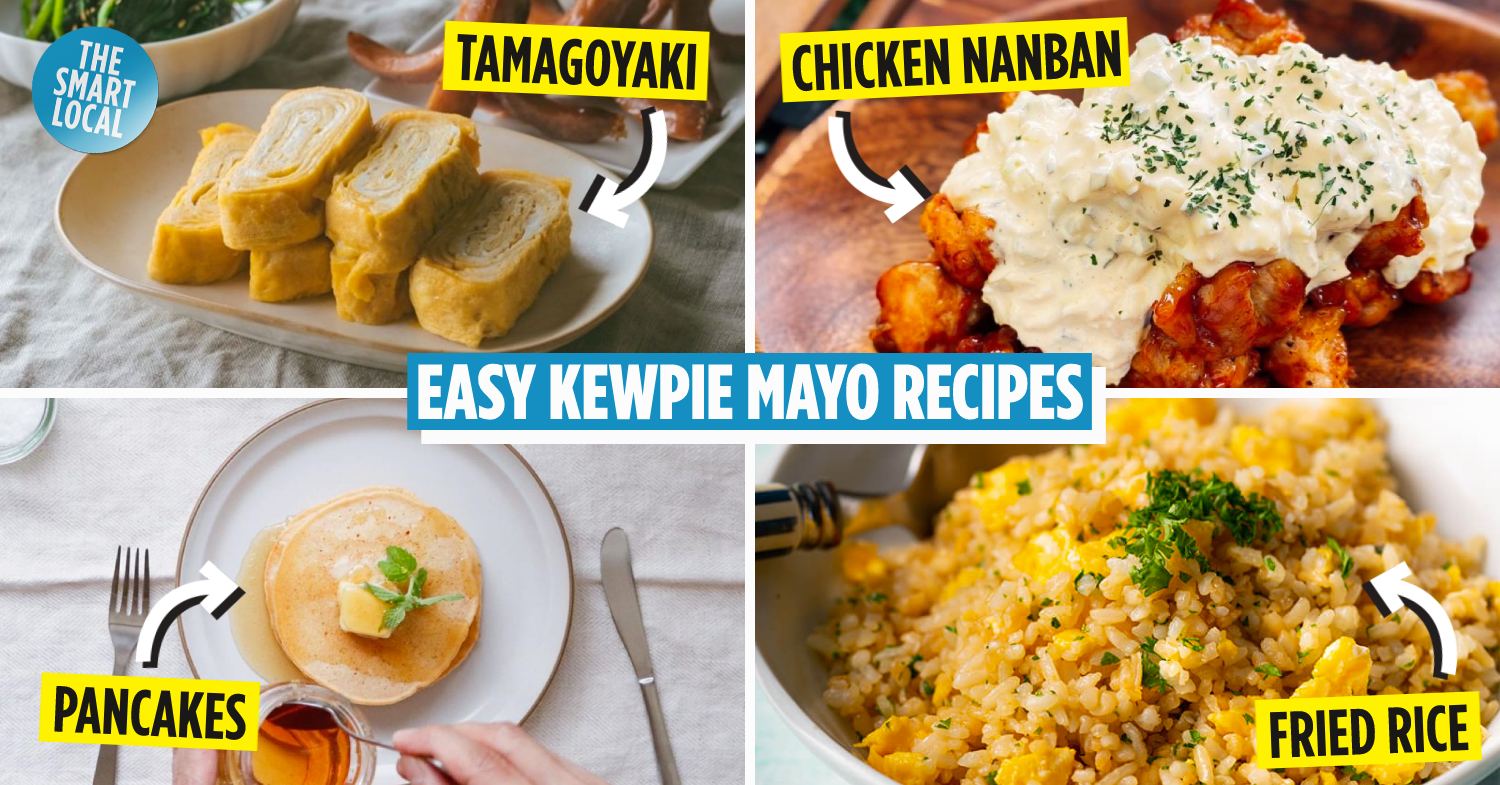
Kewpie mayonnaise recipes
Anime and manga series have no shortage of characters who are obsessed with one particular type of food, but Hijikata Tōshirō from Gintama takes the cake with his rabid love for Kewpie mayonnaise. As a mayo fanatic, Hijikata cannot survive without drowning all of his food in an absurd amount of condiment.
While we don’t recommend topping off your desserts and coffee with copious amounts of mayonnaise, the iconic condiment is a versatile kitchen staple to keep on hand. If you’re bored of making the usual tamago sando and potato salad, here are 10 recipes to put your Kewpie mayonnaise to good use.
1. Chicken nanban
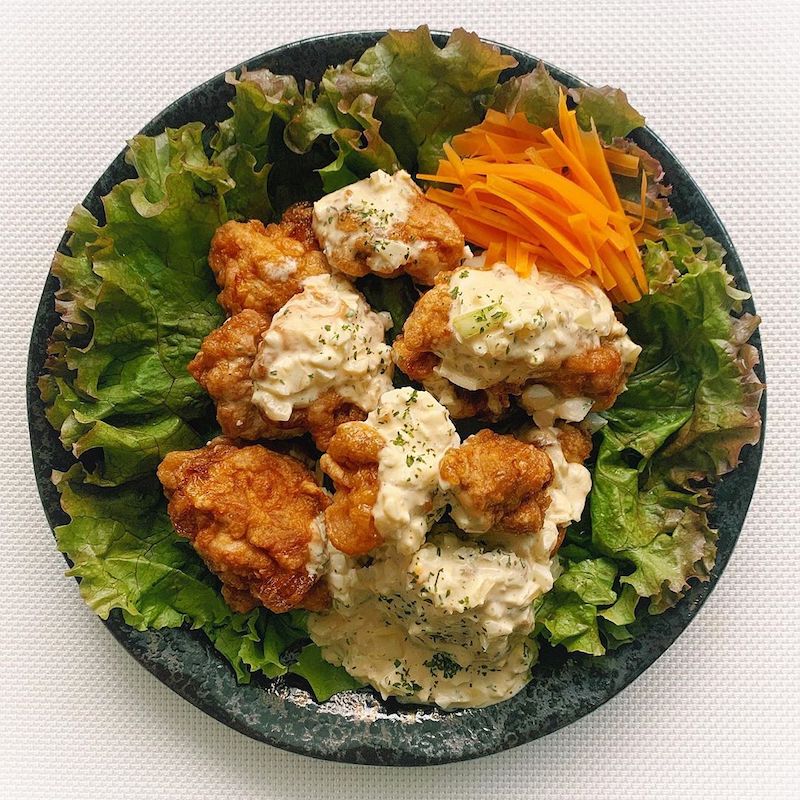
Image credit: @_tomitoomi_
Originating from Miyazaki Prefecture in Kyushu, this classic Japanese dish is now a staple at family and yōshoku (洋食, western food) restaurants nationwide. Sweet, sour, and creamy all in one dish, chicken nanban will surely whet your appetite.
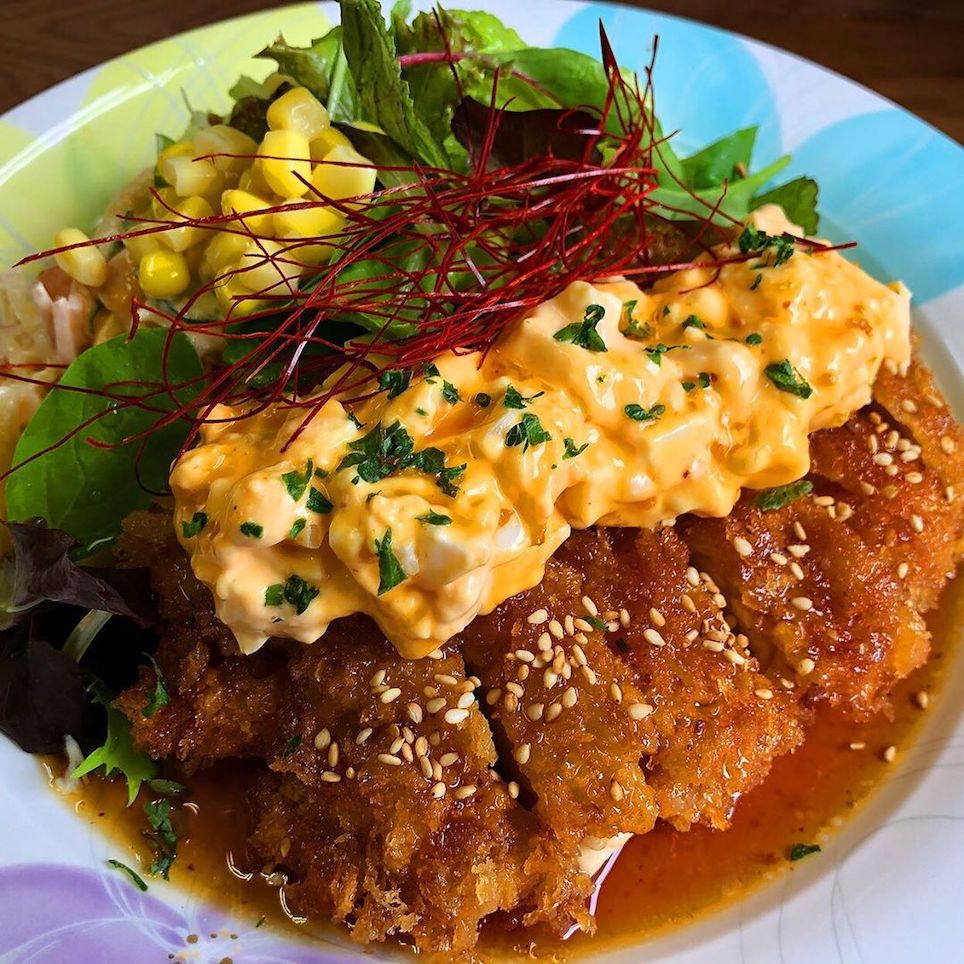
Image credit: @restaurant_ox
Marinated chicken is deep fried to golden brown perfection before being doused in a thin sweet and sour sauce. To complete the dish, the succulent karaage (fried chicken) is then topped with a generous dollop of tartar sauce. It is usually served with a side of salad and rice to cut through the richness.
Though this recipe calls for chicken breast, you can switch it up with thigh meat or drumsticks if you prefer a tender and juicier cut.
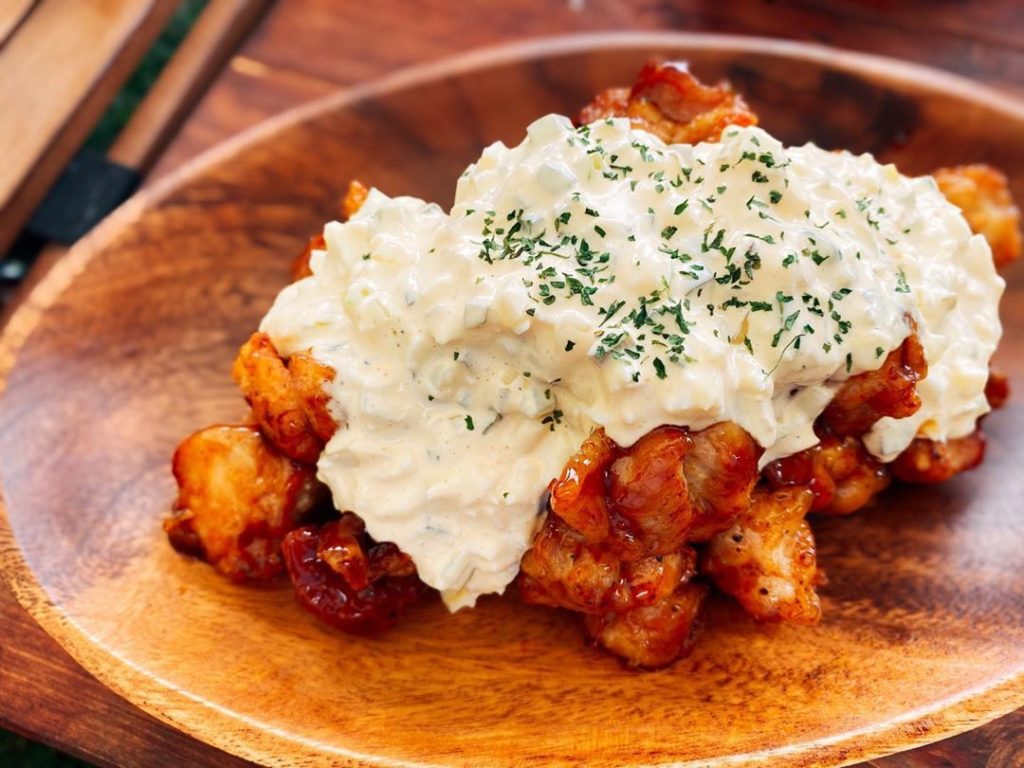
Image credit: @daigorooo_hooobby
Serves 2
Ingredients:
Nanban sauce
- 1 ½ tbsp sugar
- 1 tbsp soy sauce
- 1 ½ tbsp vinegar
- Half a dried red chilli pepper, with seeds removed
Tartar sauce
- Half a boiled egg, finely diced
- 3 tbsp Kewpie mayonnaise
- 30g finely diced onions
- 1 finely diced pickled cucumber
- 1 ½ – 2 tbsp of milk
- Salt and pepper
Chicken
- 300g chicken breast
- 1 tsp sake
- 1 tbsp all purpose flour or cake flour
- 1 egg, beaten
- Salt and pepper
Salad
- Shredded cabbage leaves
- Cherry tomatoes
- Sliced cucumbers
- Baby salad greens or lettuce leaves
- Parsley leaves
Steps:
Nanban sauce
- Combine all ingredients for the sauce in a bowl and mix thoroughly. Make sure that the sugar is fully dissolved. Set aside.
Tartar sauce
- Place finely diced onions in a sieve and rub salt into the onions. Rinse them and thoroughly squeeze out excess water using a paper towel.
- Add the onions into a bowl along with finely chopped eggs, Kewpie mayonnaise, and pickled cucumber.
- Mix it with a spatula and pour in the milk until you’ve reached the desired consistency. It should be thick enough to hold its shape.
- Taste and season with salt and pepper accordingly.
Chicken
- Prepare the chicken breast by trimming away excess fat. If your poultry comes with skin, remove it as well. Pat the chicken dry with a piece of paper towel.
- Slice off the thin part of the chicken. Next, with your knife slightly angled, cut the chicken into half. Slice the chicken into 5 pieces, ensuring that they are roughly the same size. You should end up with 6 pieces of chicken.
- Place the chicken pieces onto a cooking tray and season both sides with salt. Pour sake over the chicken and rub it in.
- In a ziplock bag, place the flour and chicken pieces. Shake the bag to evenly coat the chicken pieces with flour.
- Dip the coated chicken in the beaten egg. Shake off excess and gently drop the pieces into a pot of vegetable oil that has been heated to 170°C.
- Flip the chicken when the outside has firmed up.
- Once it’s golden brown, remove the chicken from the oil and drain thoroughly. Place the chicken in the nanban sauce and toss around to coat generously.
Assembly
- To assemble, place the chicken on a plate alongside the vegetables. Spoon a generous amount of tartar sauce over the chicken and top with shredded parsley.
2. Garlic butter fried rice
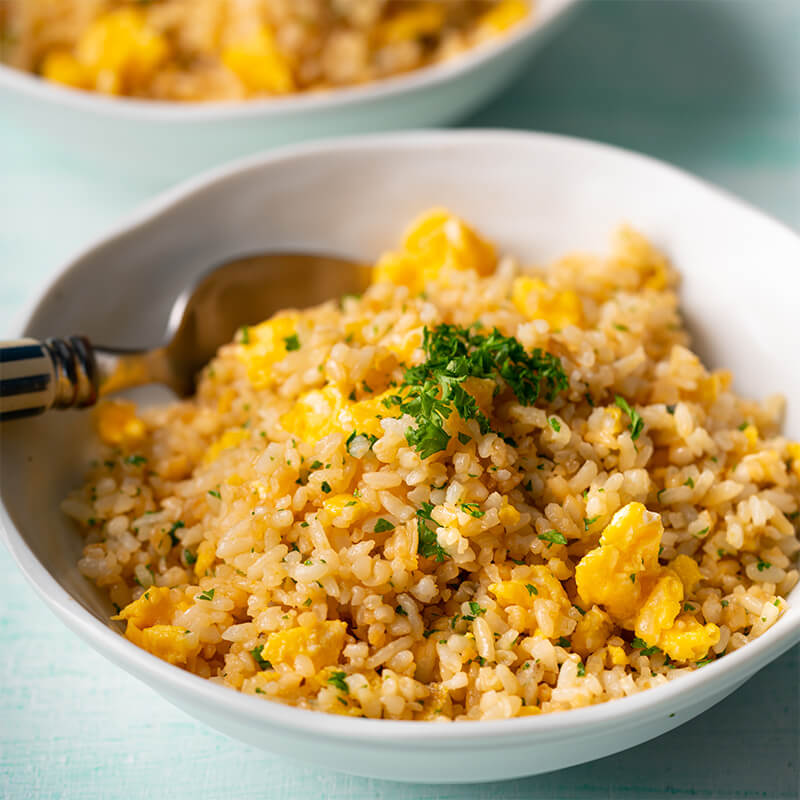
Image credit: Marion’s Kitchen
Making garlic butter fried rice is not difficult. But making a good plate of fried rice – one with soft grains that don’t stick together – takes quite a bit of skill and technique. Apart from applying common hacks like using high heat and day-old rice, try adding a little Kewpie mayonnaise to your dish.
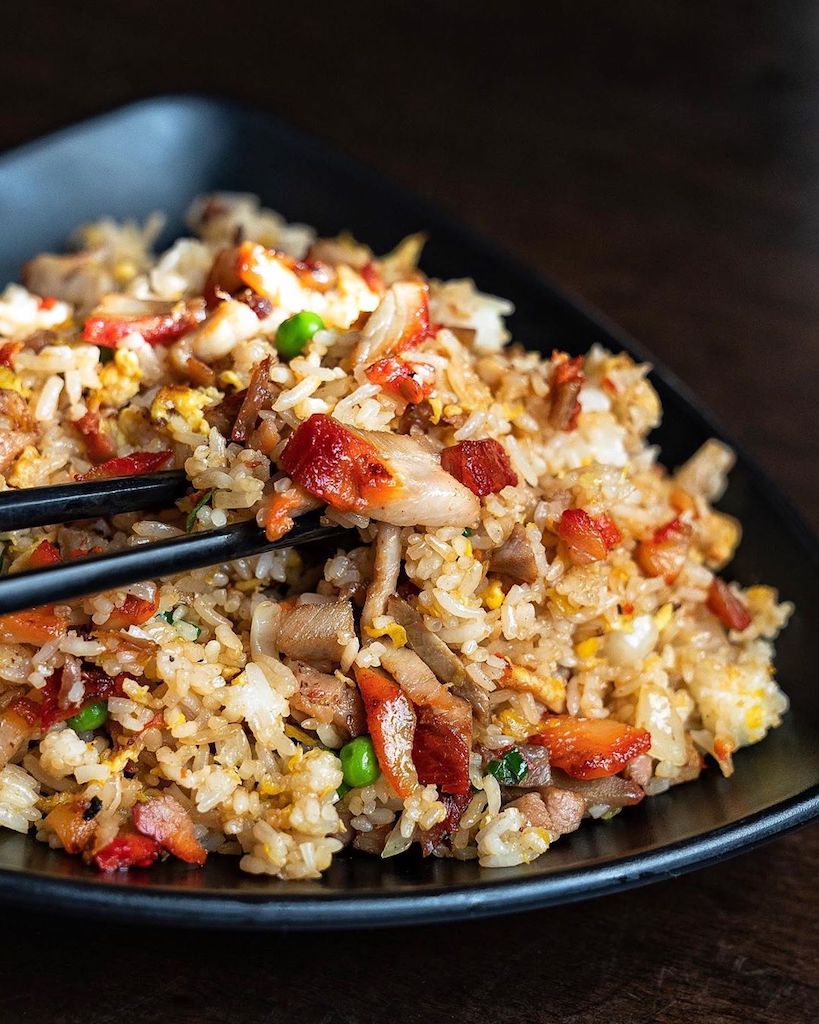
Image for illustration purposes
Image credit: @jaderestaurantatx
It might sound counter–intuitive, but the added mayonnaise will coat every single rice grain and allow it to fry evenly. Don’t worry, you can barely taste the mayonnaise – the extra fat adds a unique umami flavour to the dish without being overpowering.
Serves 2
Ingredients:
- 2 servings of leftover Japanese short grain rice
- 3 tbsp Kewpie mayonnaise
- 2 tbsp unsalted butter
- 3 garlic cloves, finely chopped
- 1 ½ tbsp soya sauce
- 2 eggs, lightly beaten
- 2 tsp finely chopped parsley
- Salt
Steps:
- Add Kewpie mayonnaise and rice into a bowl. Mix thoroughly with a fork until every grain is evenly coated with the mayonnaise and there are no clumps of rice.
- Heat the butter in a pan over medium heat. Once the butter is fully melted, add the garlic and fry for another minute.
- Add the rice and stir-fry until it is evenly coated with the garlic butter mixture. Add the soya sauce and toss until well combined.
- Scrape fried rice to the side to make room for the egg. Add beaten egg and allow it to cook for half a minute before scrambling. Mix the scrambled egg into the rice and continue to stir-fry everything.
- Taste and season with salt accordingly. Finally, add the chopped parsley and toss it through the rice. Serve.
3. Fried shrimp mayo
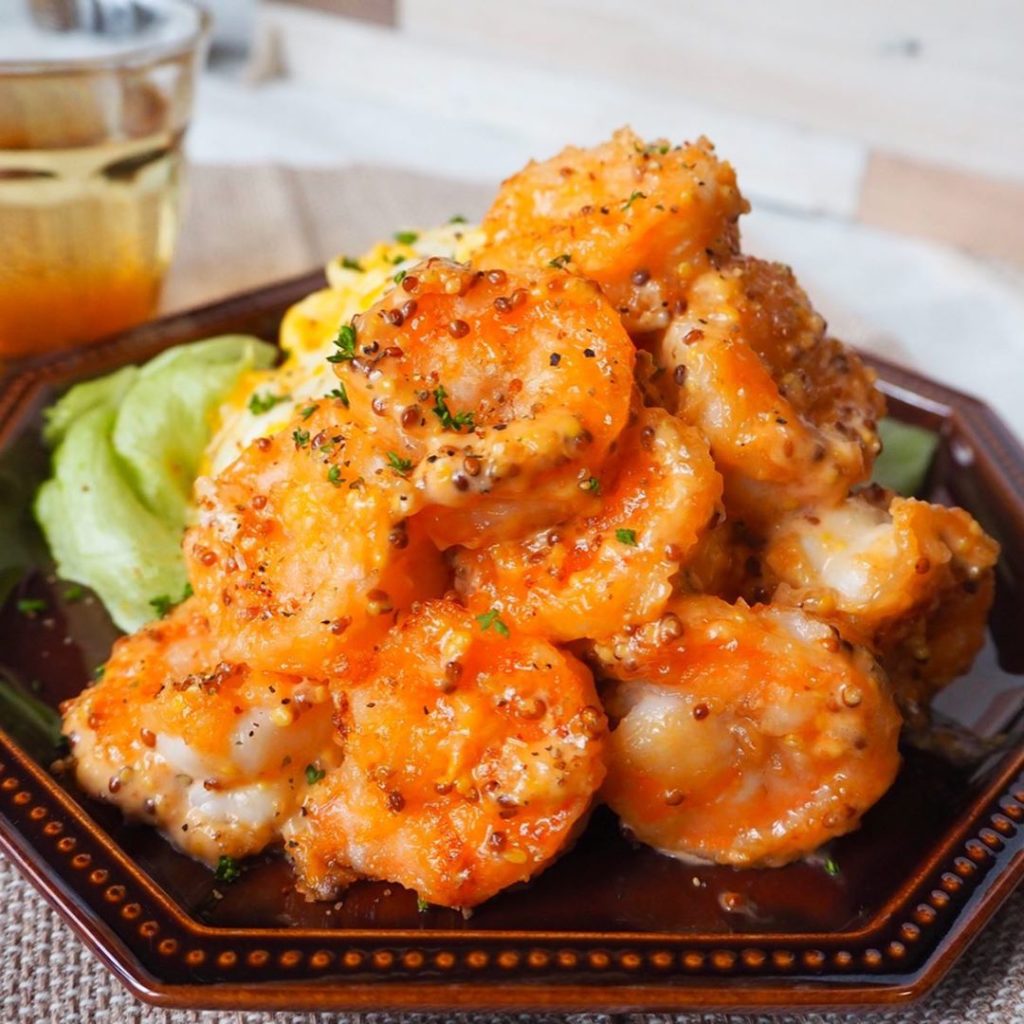
Image credit: Shinya Gohan
Fried shrimp mayo, or puripuri ebi mayo (ぷりぷり海老マヨ), is an izakaya (Japanese pub) speciality. Puripuri is a Japanese onomatopoeia that describes the plump and bouncy sensation of biting into a fresh shrimp.
Fried shrimp coated with a mixture of Kewpie mayonnaise and ketchup may sound cloyingly rich, but it is the perfect appetiser to go with a cold pint of beer.
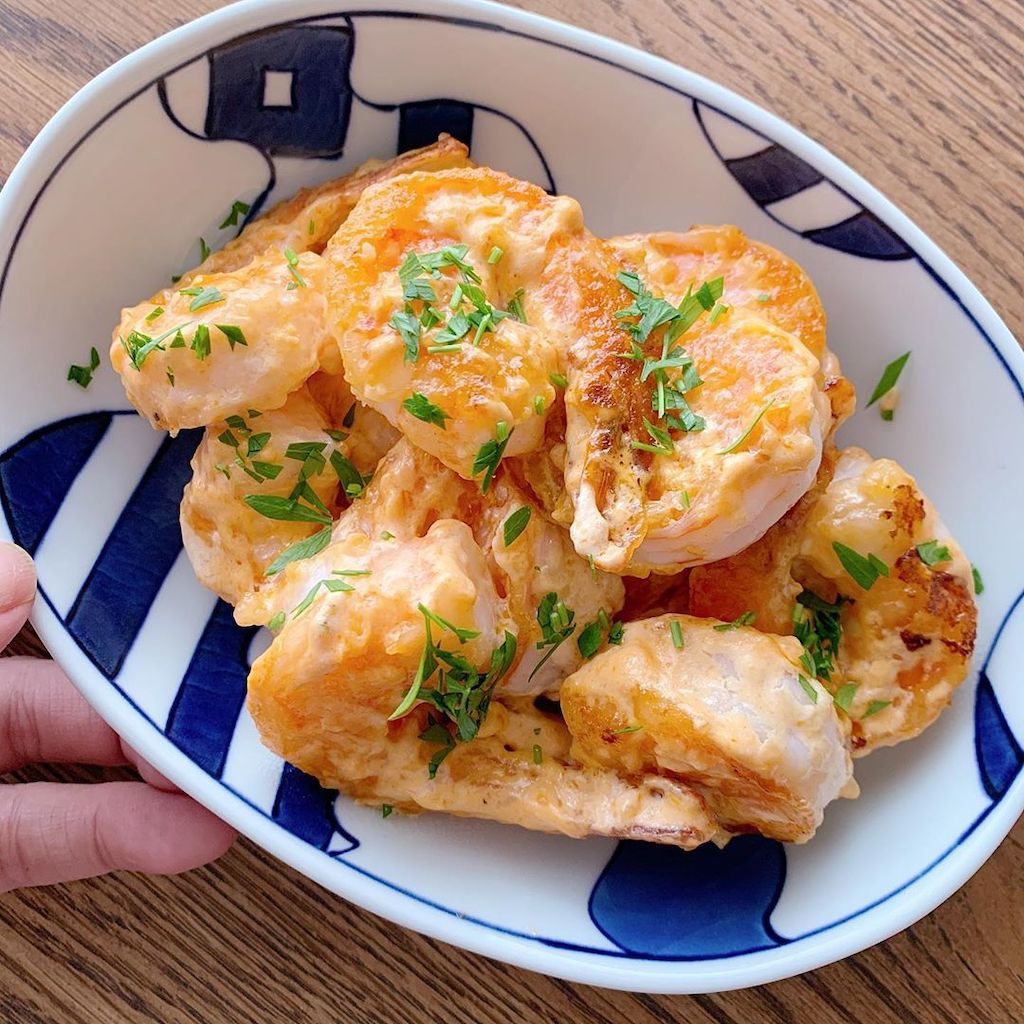
Image credit: @_______.aicoo
Serves 2
Ingredients:
- 16 de-shelled and deveined shrimps
- Salt
- 1 tbsp potato starch, plus more for coating
- 1 tbsp sake
- Vegetable oil, or any flavourless cooking oil
- 3 tbsp Kewpie mayonnaise
- 1 ½ tbsp ketchup
- 1 tbsp whole grain mustard
- Lettuce
- Parsley, chopped
Steps:
- Place shrimps, potato starch, sake and a pinch of salt into a bowl. Knead gently to clean the shrimps, then rinse it with clean water.
- Dust the cleaned shrimps with potato starch.
- Heat around 2 tbsp of oil in a pan until hot, then pan fry the shrimps. When it turns golden brown on one side, flip the shrimps and pan fry until they are fully cooked. Set aside.
- To prepare the sauce, combine Kewpie mayonnaise, ketchup, and whole grain mustard in a bowl. Mix thoroughly.
- Add cooked shrimps to the sauce and toss to ensure that they are coated evenly.
- Top it off with chopped parsley leaves and serve with a side of lettuce.
Check out the original recipe with step-by-step instructions here, or this for a video guide with a similar recipe.
4. Miso mayo chicken
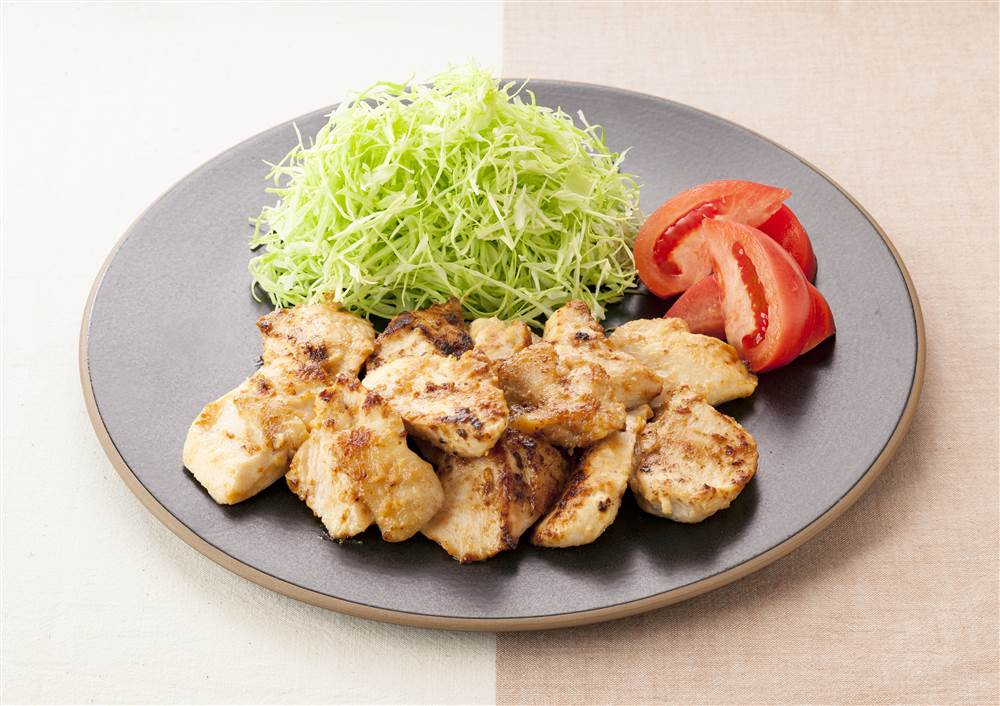
Image credit: Kewpie Corporation
Miso is a type of fermented soya bean paste and a quintessential ingredient in Japanese cooking. As it is packed with enzymes, miso can help tenderise meat, resulting in a softer and juicier bite.
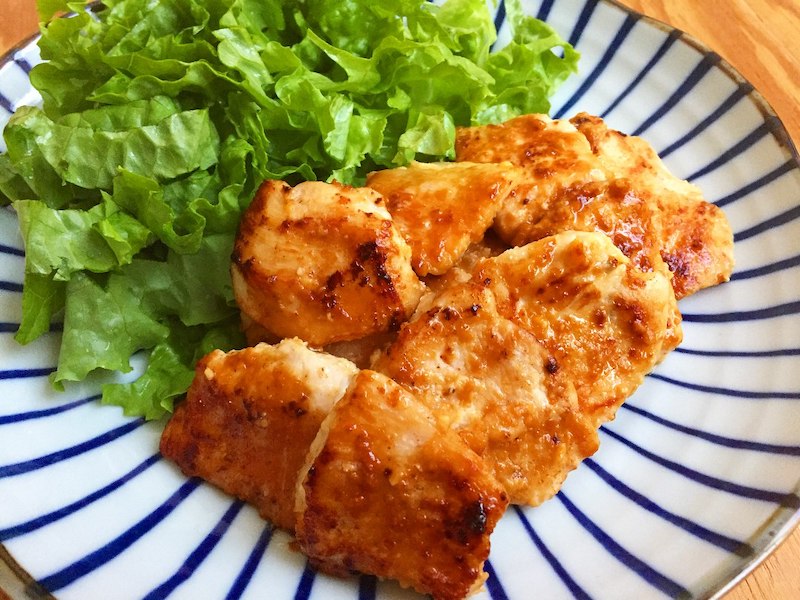
Image credit: @aka.ru38
If you prefer a stronger taste, opt for red miso, a type of miso that has been fermented for a longer period of time. Keep in mind that red miso is generally saltier and more pungent than white miso, so you might want to tweak the recipe and halve the amount used.
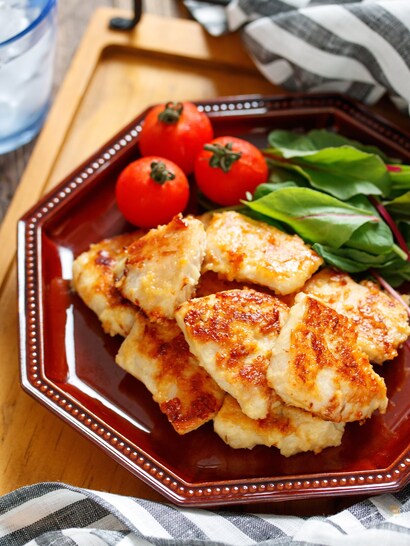
Image credit: Nadia
Serves 2
Ingredients:
- 180g chicken breasts
- 2 tbsp miso
- 2 tbsp Kewpie mayonnaise
- Vegetable oil, or any flavourless oil
- 120g cabbage
- Half a tomato
Steps:
- In a bowl, add miso and mayonnaise. Mix thoroughly.
- Cut chicken breast into bite-sized pieces. Add the chicken pieces into the miso-mayo mixture and marinate it for at least 10 minutes.
- Heat about 2 tbsp of oil in a pan over medium heat and pan-fry the chicken.
- When it’s golden brown, flip the chicken pieces. Add the remaining marinate and cook with the chicken.
- To assemble, chop tomatoes into quarters and finely shred cabbage. Arrange the vegetables and chicken on a serving plate. Serve.
Check out the original recipe here for a step-by-step tutorial.
5. “Eggs Benedict”
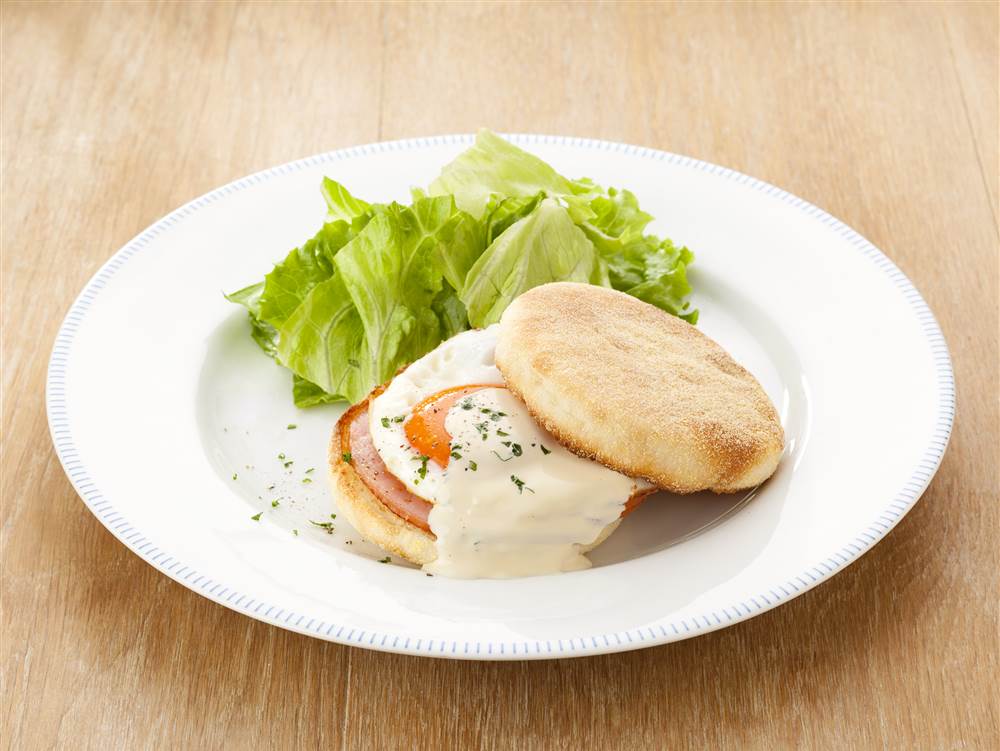
Image credit: Kewpie Corporation
There’s nothing like a good leisurely brunch on a Sunday morning, but the hefty price tag for a plate of eggs Benedict may deter some from having that well-deserved weekend treat.
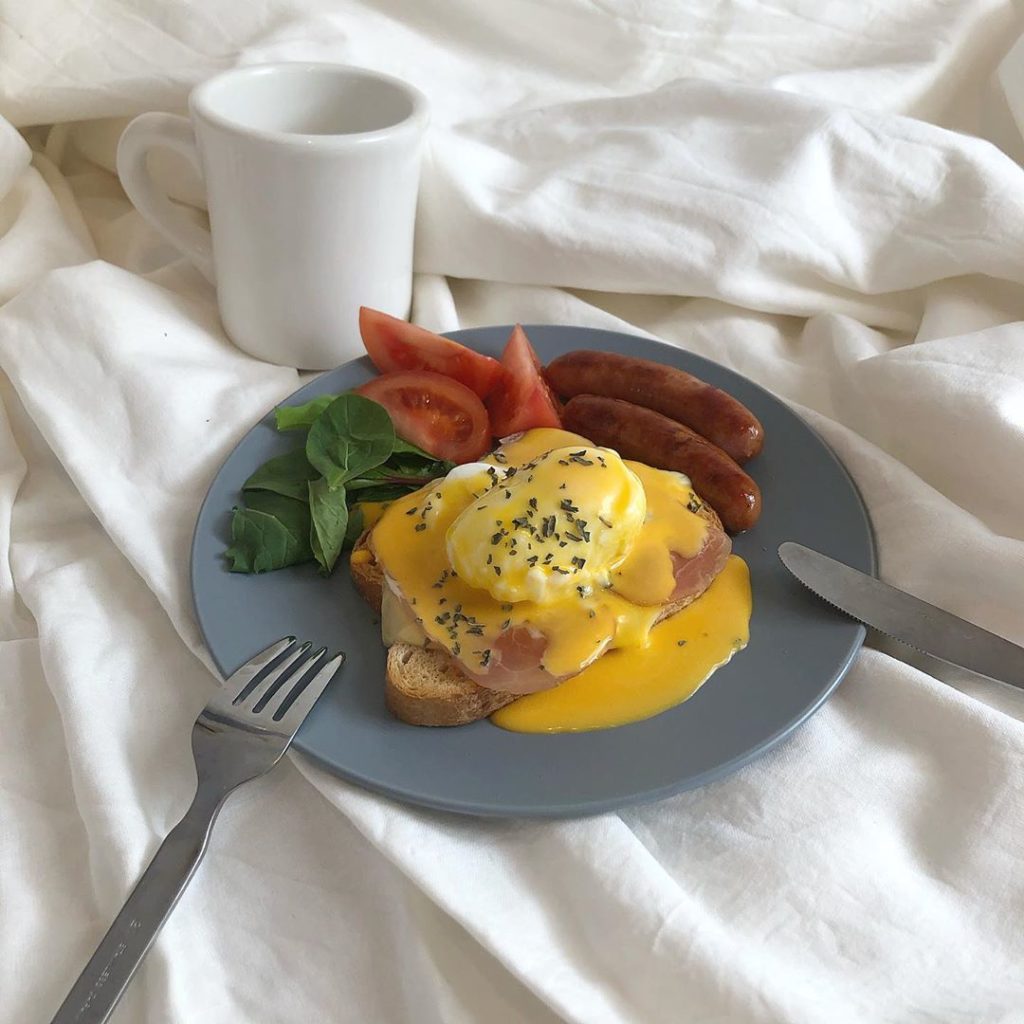
Image for illustration purposes
Image credit: @piyochiko.hii
If you feel hesitant about forking out a princely sum for 2 poached eggs doused in hollandaise sauce, this cheat recipe is a quick fix for your breakfast cravings.
Experienced chefs will know that hollandaise sauce can be finicky and requires patience to master. This 2-ingredient sauce cuts through all that mess to give you that coveted creaminess with zero fuss.
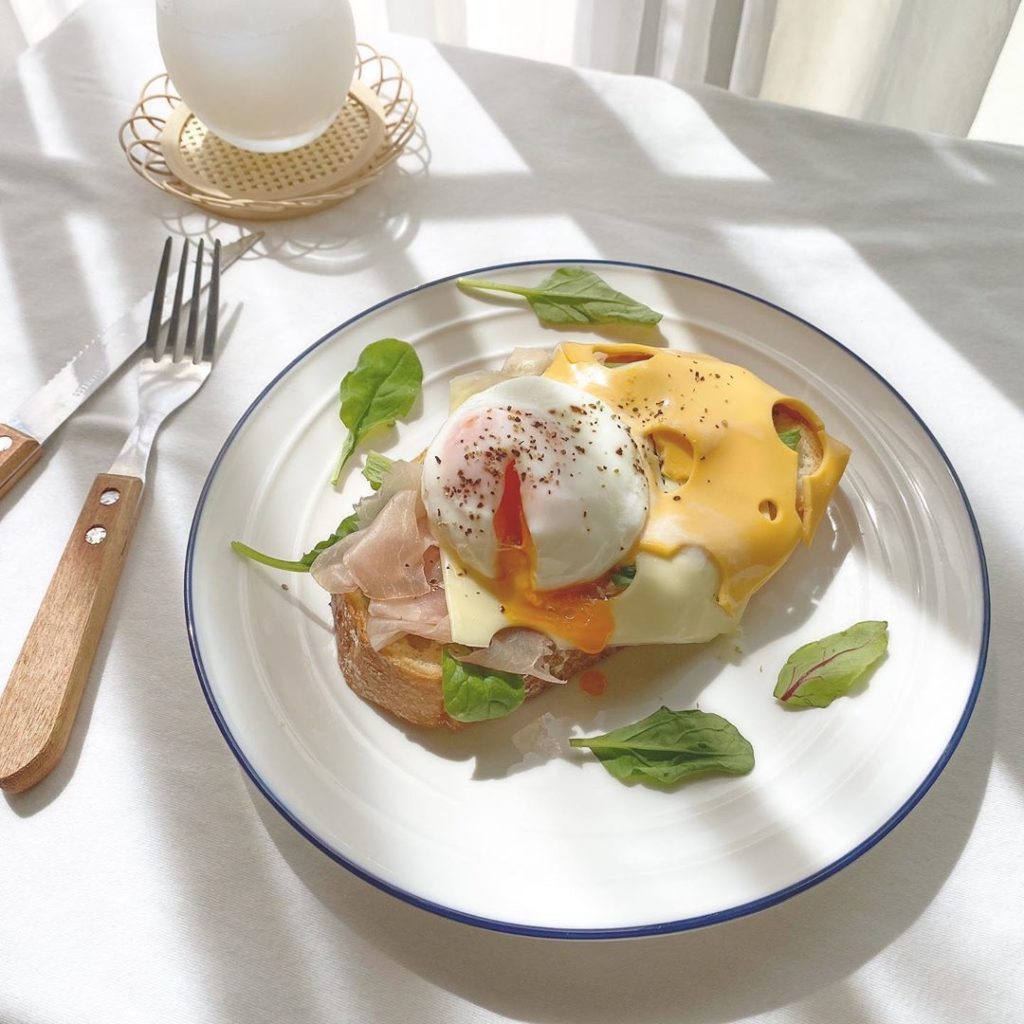
Image for illustration purposes
Image credit: @__yama46
Serves 2
Ingredients:
- 2 English muffins
- 2 eggs
- 4 slices of ham
- 2 servings of lettuce, or any salad vegetables of your choice
- Parsley
- Black pepper
- Vegetable oil
- 15g plain yogurt
- 30g Kewpie mayonnaise
Steps:
- Heat about 1 tbsp of oil in a pan over medium heat and fry the eggs. When the egg whites are firm and the yolks remain runny, remove them from the pan and set aside.
- Using the same pan, fry the ham until they have taken on some colour.
- Prepare lettuce or any vegetable of your choice by rinsing them with clean water. Shake off excess water and cut into smaller pieces. Arrange them on your serving plates and set aside.
- Slice English muffins in half and toast in a toaster.
- To make the “hollandaise” sauce, add the yogurt and Kewpie mayonnaise into a bowl. Mix thoroughly.
- Lay the toasted muffins on the serving plates, followed by the ham and eggs. Finally, spoon a generous amount of sauce over the eggs. Sprinkle with chopped parsley and serve.
Check out the original recipe here.
6. Fluffy tamagoyaki
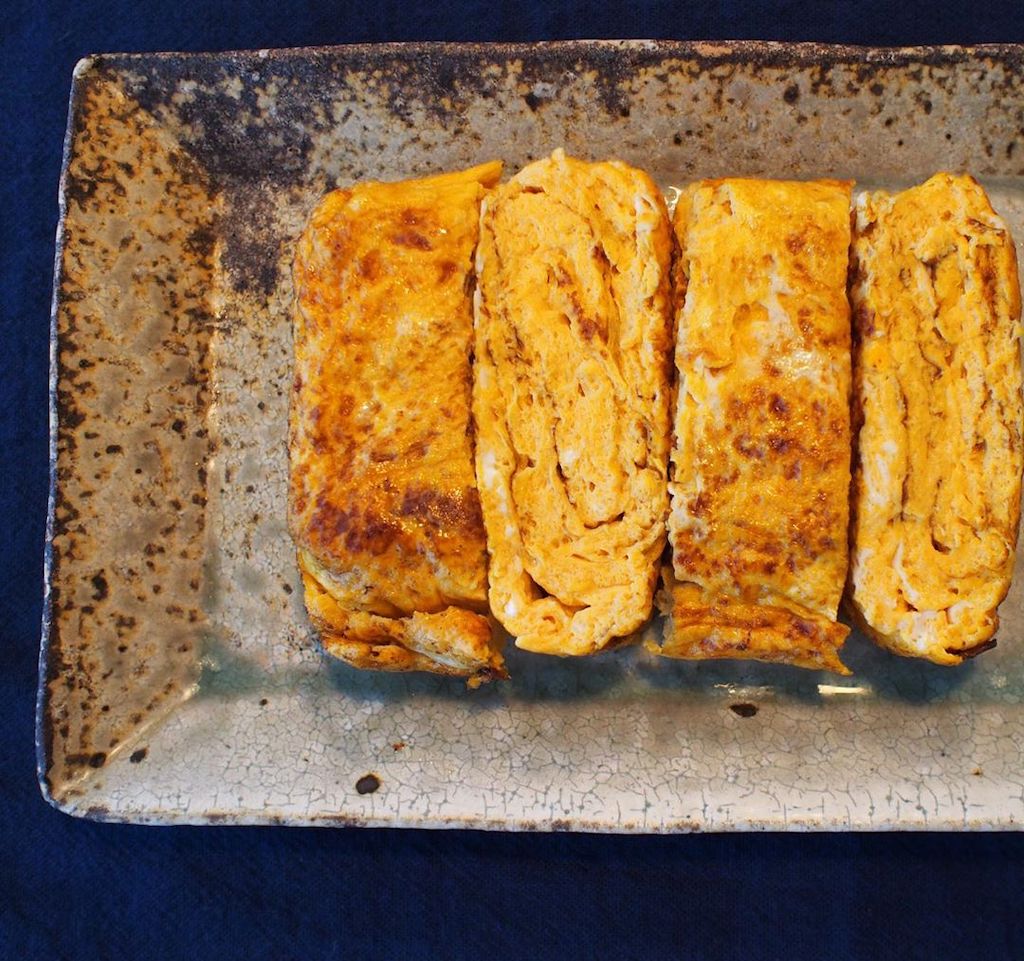
Image credit: @mizuame7
Tamagoyaki (卵焼き) is a Japanese rolled omelette that is made by rolling many thin sheets of egg into a rectangular log. In Japan, the dish also goes by “atsuyaki tamago” (厚焼き卵), which means “thick grilled egg”.
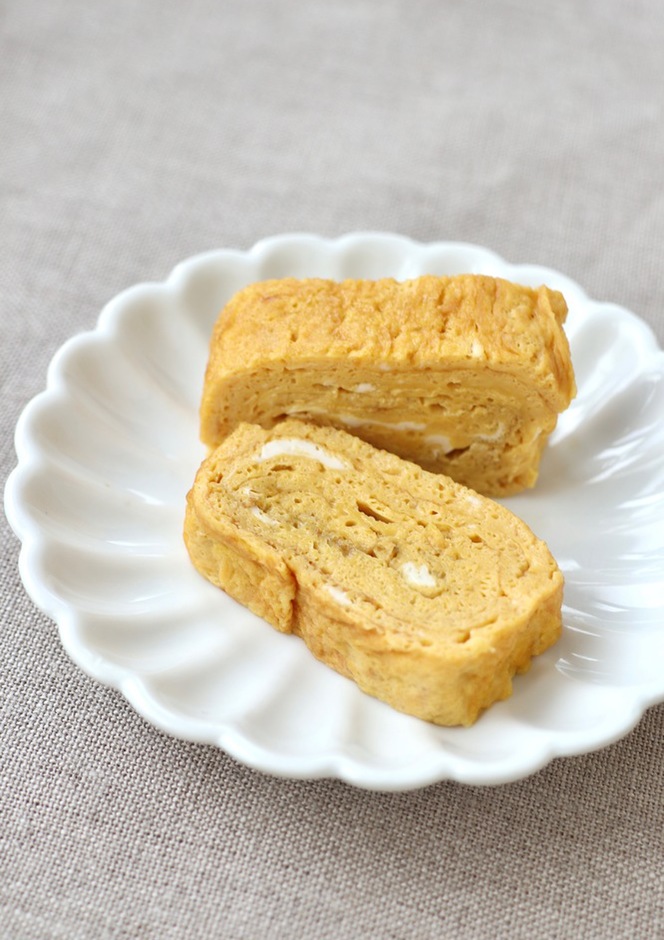
Image credit: Oishii Kenkō
Adding Kewpie mayonnaise to the egg mixture yields a silkier omelette and gives it a beautiful shine. Here’s the science behind it – the added fat and rice vinegar, which are the main components of mayonnaise, help to break down the proteins in eggs. This ensures that the egg stays soft even after it has cooled down.
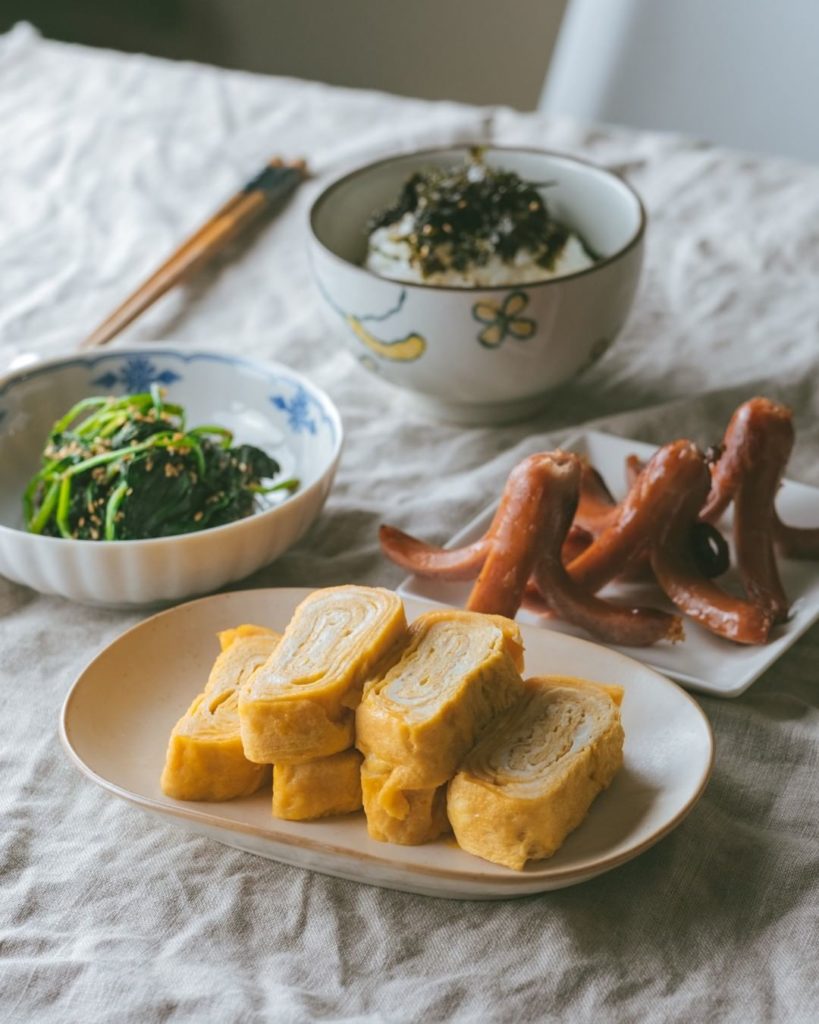
Tamagoyaki with other side dishes and rice
Image credit: @soyandpepper_
Serves 2
Ingredients:
- 4 eggs
- 2 tbsp mirin
- ½ tbsp soya sauce
- Vegetable oil, or any flavourless oil
- 1 tbsp Kewpie mayonnaise
- Grated daikon (optional)
Steps:
- Crack the eggs into a bowl and add Kewpie mayonnaise. Mix the mixture until homogeneous, but be careful not to beat it too vigorously to avoid introducing too many air bubbles.
- Add mirin and soya sauce. Mix thoroughly.
- Heat oil in a tamagoyaki pan over medium heat until you can feel the heat when you hover your hand over it.
- Pour about 1 ladleful of egg mixture into the pan and swirl to ensure that the egg is evenly distributed.
- Using a pair of chopsticks, break any bubbles that have formed. Let the egg cook until it’s no longer too runny on the surface.
- Carefully fold the egg from one end to the other using your chopsticks. Grease the pan with an oiled kitchen towel and pour in another ladle of egg. Gently lift up the folded egg to let raw egg mixture run under it.
- Repeat step 4 to 6 until you run out of egg mixture. Ensure that the layers are tightly adhered to each other.
- You can serve it immediately or wait for it to chill. Cut into bite-sized pieces and serve with grated daikon.
Check out the original recipe here.
7. Grilled cheese sandwich
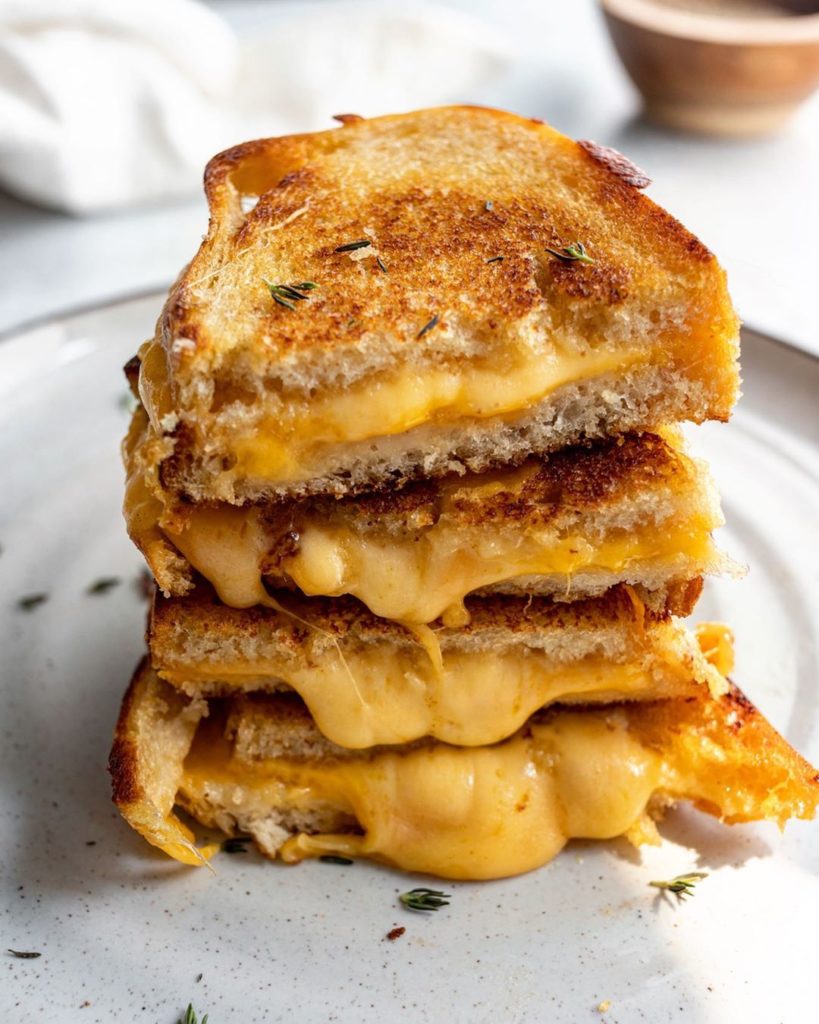
Image credit: @seasonedbysilvie
A grilled cheese sandwich is as straightforward as it sounds – it’s cheese sandwiched between 2 slices of bread, grilled with butter to golden brown perfection. It’s hard to improve upon such a simple dish, but one life-changing hack that chefs swear by is using mayonnaise instead of butter when grilling the sandwich.
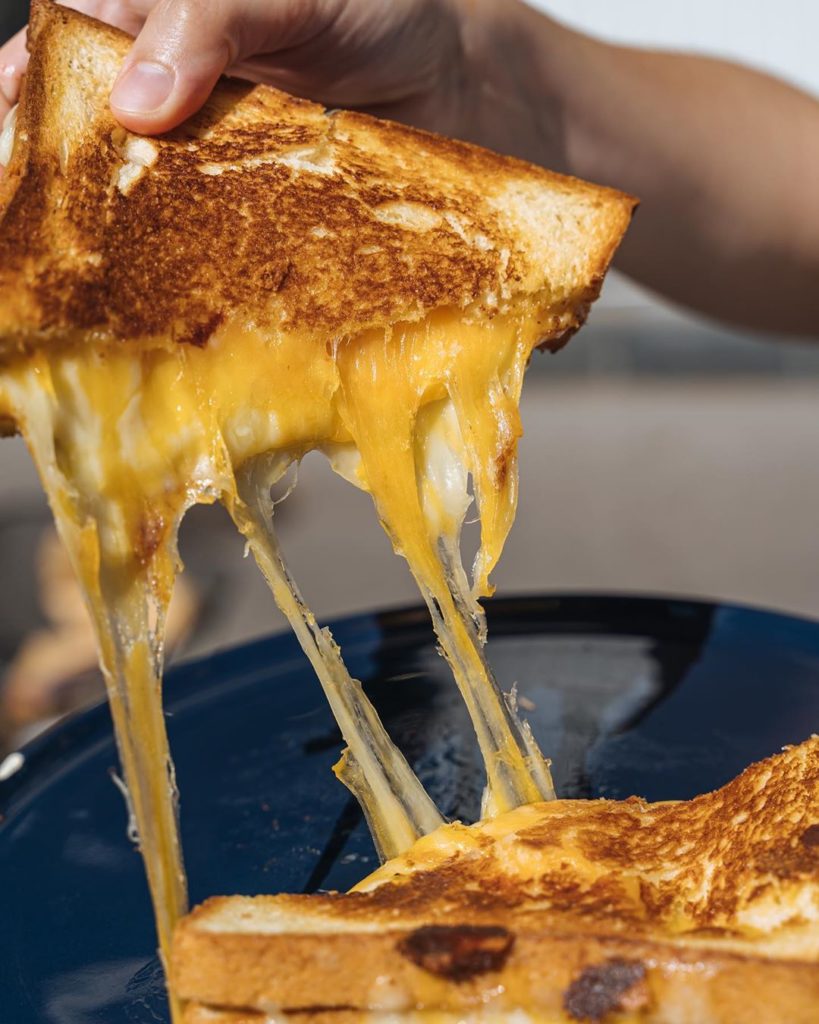
Image credit: @tgcfactory
Since mayonnaise has a higher smoke point than butter, it’s a better option as it will not burn so easily. This also means that the bread can be grilled for longer, yielding sandwiches with a much crunchier exterior.
Alternatively, you can also get the best of both worlds by using butter to grill the outside and slather mayonnaise on the inside of the bread. The tangy Kewpie mayonnaise cuts through the richness of the cheese and provides a nuanced flavour.
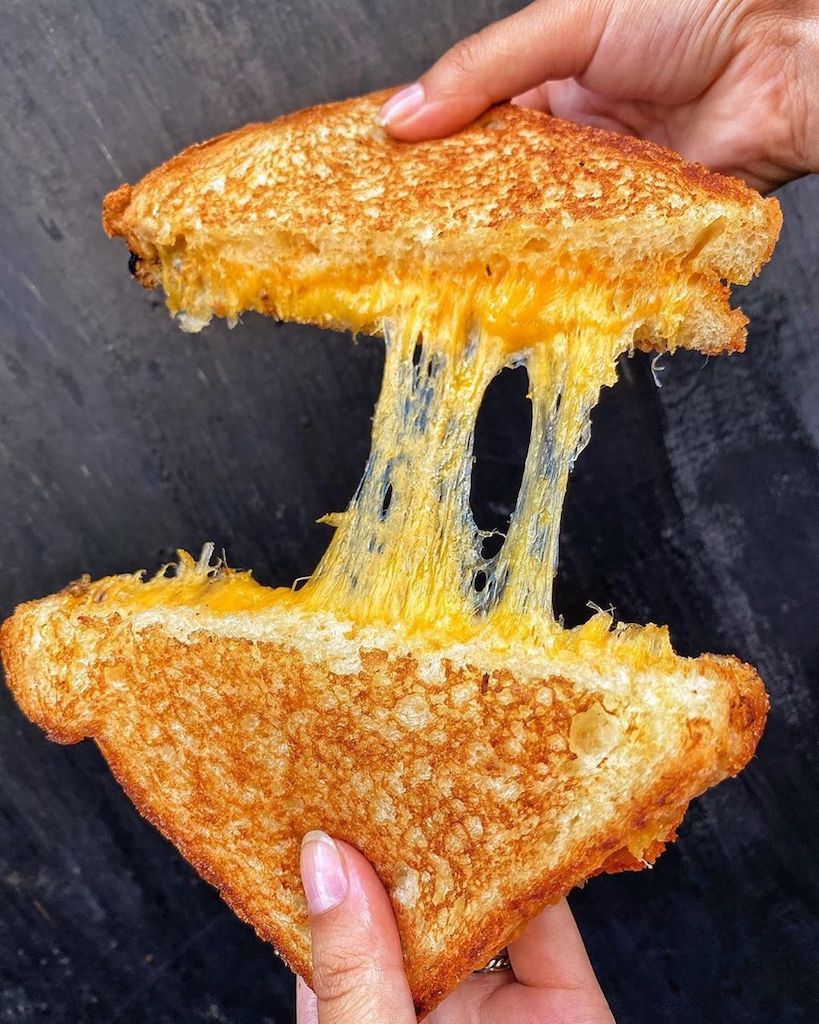
Image credit: @murraysmac
Serves 1
Ingredients:
- 2 slices of white bread, or any bread of your choice
- 2 tbsp Kewpie mayonnaise
- 1 tbsp unsalted butter
- 4 slices of thinly sliced American cheese, cheddar, or any cheese of your choice
- Black pepper
Steps:
- Place the bread slices on a cutting board and slather Kewpie mayonnaise on them.
- Heat a frying pan over medium heat and add half the butter. When it melts, place the bread mayonnaise–side down in the pan.
- Layer with cheese and season with black pepper. Top with the second slice of bread, mayonnaise–side up.
- When the exterior of the bread is golden brown, add the remaining butter. Once the butter melts, flip the bread. Press down on the sandwich so that it browns evenly.
- When the second side has turned golden brown and the cheese is fully melted, cut and serve immediately.
Check out the original recipe here.
8. Sugar cookies

Image credit: Kewpie Corporation
It might sound strange to use a savoury condiment in a sweet cookie recipe. But since Kewpie mayonnaise is made of oil and eggs – which are standard ingredients used in baking – it makes for an ideal addition to a variety of baked goods.

Images for illustration purposes
Image credit: @ametogumii
If you’ve ever attempted any cookie recipe that call for room temperature butter, you’d know how long it takes to get cold butter to soften. This sugar cookie recipe saves you time by replacing butter with Kewpie mayonnaise. It also works especially well with chocolate as the mayonnaise’s slight acidity offsets overpowering sweetness and enhances the cocoa flavour.
Serves 4
Ingredients:
- 220g cake flour
- 1 egg
- 55g sugar
- 5g cocoa powder
- 60g mayonnaise
Steps:
- Cream mayonnaise and sugar in a bowl until it is no longer gritty. Add egg and combine thoroughly.
- Add the sifted cake flour to the mixture and mix until you no longer see dry patches of flour.
- Divide the dough mixture into half. Add sifted cocoa powder into half the dough and mix in until you no longer see streaks of brown.
- Wrap the two halves of dough with plastic wrap and let it chill in the fridge for 30 minutes.
- In the meantime, preheat the oven to 170°C.
- Once the dough has firmed up, roll it to a thickness of 5mm with a rolling pin. Using a cookie cutter, cut the dough into desired shapes and transfer to a baking tray. You can gather and reroll the dough scraps until it is all used up.
- Bake the cookies for 10 to 15 minutes, or until they are lightly browned around the edges.
- Once done, allow cookies to cool for 5 minutes on the baking tray before transferring them to a wire rack to cool completely.
Check out the original recipe here.
9. Hotcakes
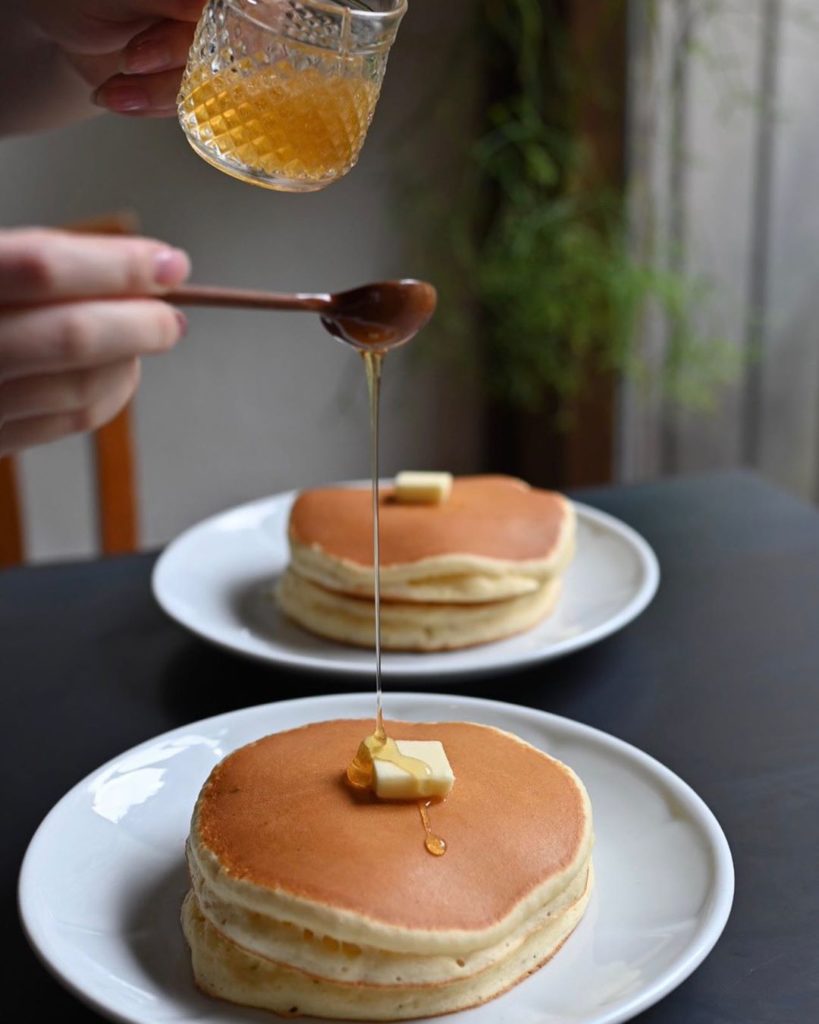
Image credit: @kko_zizistagram
“Hotcakes” are what the Japanese call pancakes, but they are fluffier and a tad sweeter than American-style ones. To make your hotcake mix taste even better, add some Kewpie mayonnaise. The extra emulsified fat and vinegar in the mayo reacts well with raising agents in the dry hotcake mix, which gives the batter an extra lift, producing soft and airy pancakes.
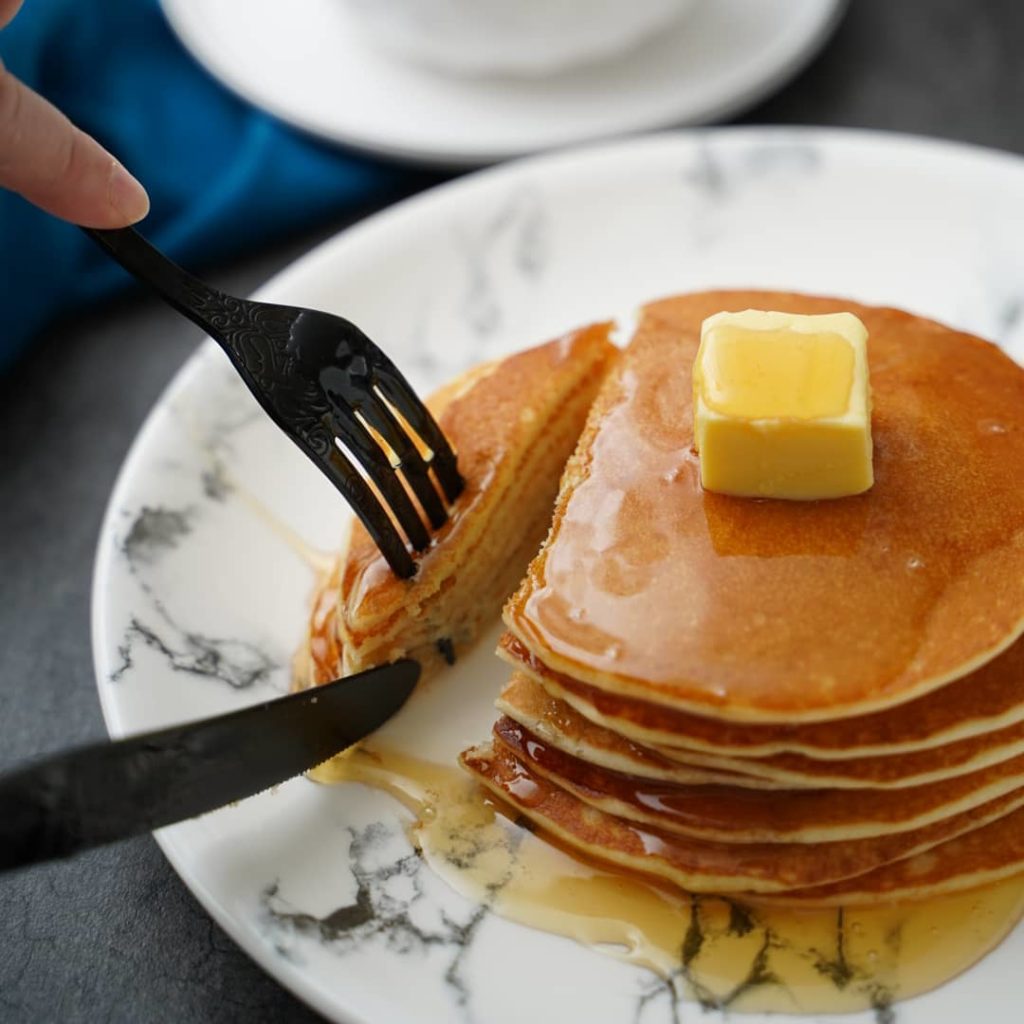
Image credit: @soubunbun
The key to getting that picture-perfect golden brown surface is to ensure that the pan is evenly heated and greased with just a thin layer of oil.
Thanks to the addition of mayonnaise, these pancakes stay soft and fluffy for longer. You can double the recipe and store extras in the freezer. Simply thaw them in the microwave and you can have warm hotcakes anytime to satiate your cravings.

Image credit: @nakahira_3
Serves 2
Ingredients:
- 150g hotcake mix
- 1 egg
- 80ml milk
- 1 ½ tbsp Kewpie mayonnaise
- Vegetable oil, or any flavourless oil
- Butter (optional)
- Maple syrup (optional)
Steps:
- Add the dry hotcake mix, egg, milk, and Kewpie mayonnaise into a mixing bowl. Whisk together until the mixture is homogeneous. Be careful not to overmix the batter.
- Heat a non-stick pan over medium heat and lightly grease with a thin layer of oil.
- Hover your hand over the pan. When it feels hot, ladle ¼ of the mixture onto it. Cook until bubbles form and break, and the edges of the hotcake becomes dry.
- Turn the pancake over, and let the other side cook for 1 ½ to 2 minutes, or until it reaches a light golden brown colour.
- Repeat step 3 to 4 until you’ve used up the remaining batter. Serve hotcakes with a slab of butter and maple syrup, or your desired toppings.
Check out the original recipe here, or this video for a step-by-step tutorial.
10. Chocolate pudding
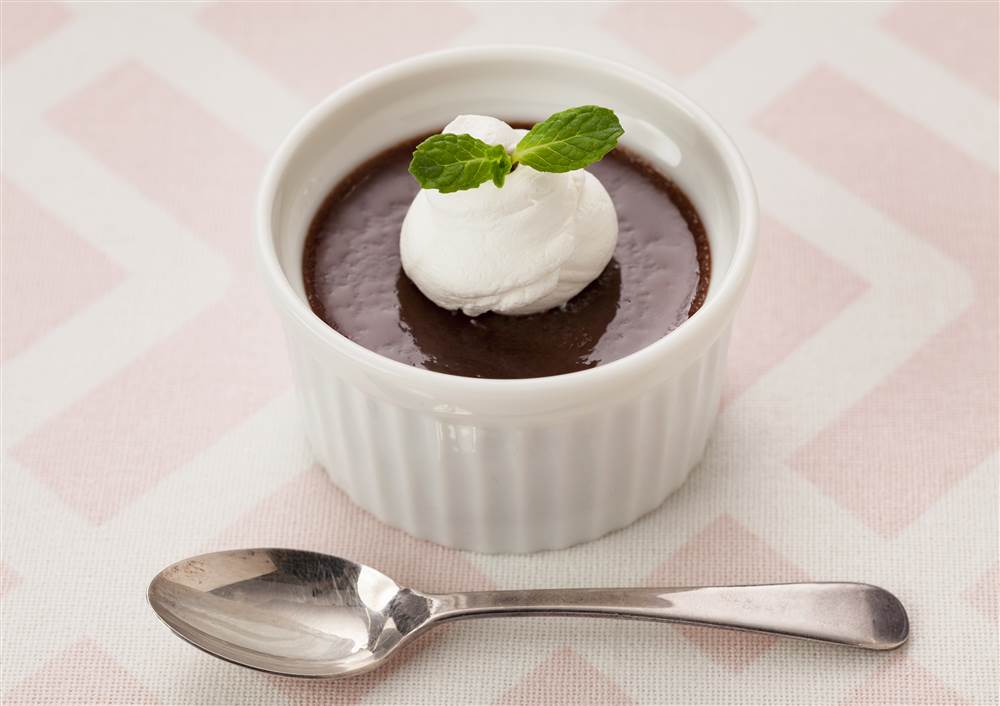
Image credit: Kewpie Corporation
Pudding, or purin (プリン), is a popular dessert in Japan. Unlike its gelatinous western counterparts, Japanese pudding is known for its custardy and silky mouthfeel.
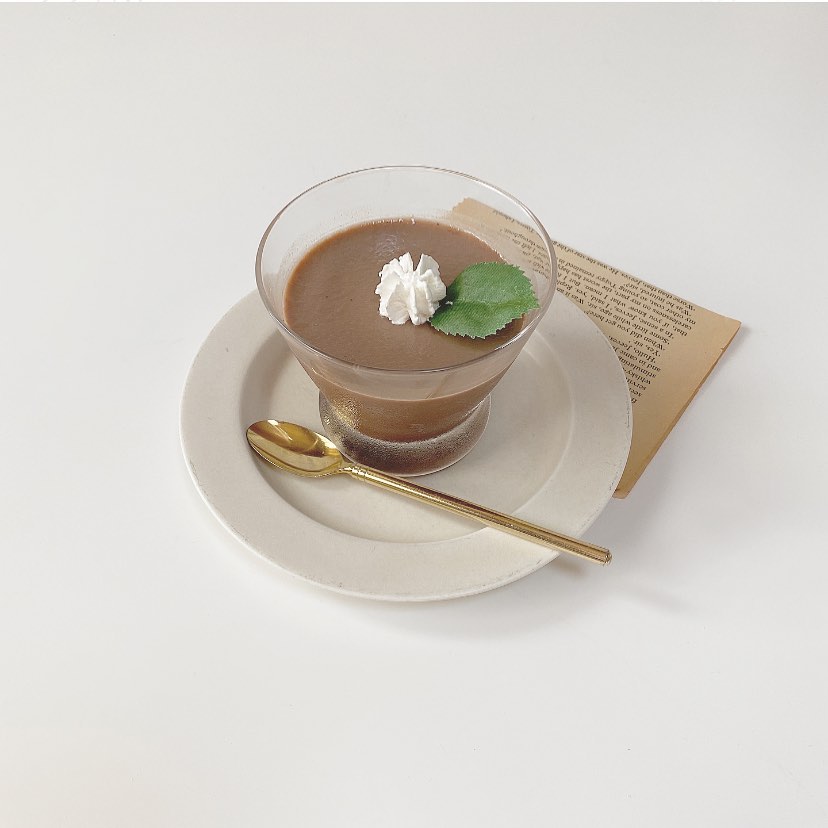
Image for illustration purposes
Image credit: @cocigimi
It is no secret that salt goes well with chocolate. The slight saltiness of Kewpie mayonnaise brings out the cocoa powder’s inherent sweetness and makes the flavour pop. Though the recipe calls for whipped cream and mint as finishing touches, feel free to swop it out for your preferred toppings.

Image for illustration purposes
Image credit: @izumi_oyatsu
Makes 6 (5cm x 3cm sized ramekins)
Ingredients:
- 100ml milk
- 1 egg
- 3 tbsp heavy cream
- 5 tbsp granulated sugar
- 2 tbsp cocoa powder
- 1 tbsp Kewpie mayonnaise
- Whipped cream
- Mint sprig
Steps:
- Add egg, sugar, Kewpie mayonnaise, and sifted cocoa powder into a bowl and mix to combine.
- When it is fully combined, lightly whisk in heavy cream and milk. Be careful not to whisk too vigorously.
- Sift the pudding mixture into a jar, preferably one with a pouring spout. Divide the mixture equally among 6 ramekins.
- Place the ramekins into a deep baking dish and pour hot water until the ramekins are submerged halfway. The water bath will prevent the edges of the pudding from overcooking.
- Bake in an oven that has been preheated to 180°C, for about 30 minutes.
- Once done, transfer the ramekins from the baking dish to a wire rack. Let them cool for at least 30 minutes, or until completely cooled, before transferring them to the fridge to chill.
- To serve, garnish with a dollop of whipped cream and a sprig of mint.
Check out the original recipe here.
Easy Kewpie mayonnaise recipes
From aromatic buttery fried rice to fluffy Japanese-style pancakes, Japan’s most trusted and beloved Kewpie mayonnaise is so much more than just an accompaniment to eggs or potatoes. Grab yourself a signature red-capped bottle of Kewpie mayonnaise and cook away.
For more recipes, check out these articles:
- Japanese cooking channels
- Japanese desserts recipes
- Anime-inspired food IRL
- How to brew Japanese teas
- Simple Japanese dishes
Cover image adapted from (clockwise from top left): @soyandpepper_, @daigorooo_hooobby, Marion’s Kitchen and @nakahira_3