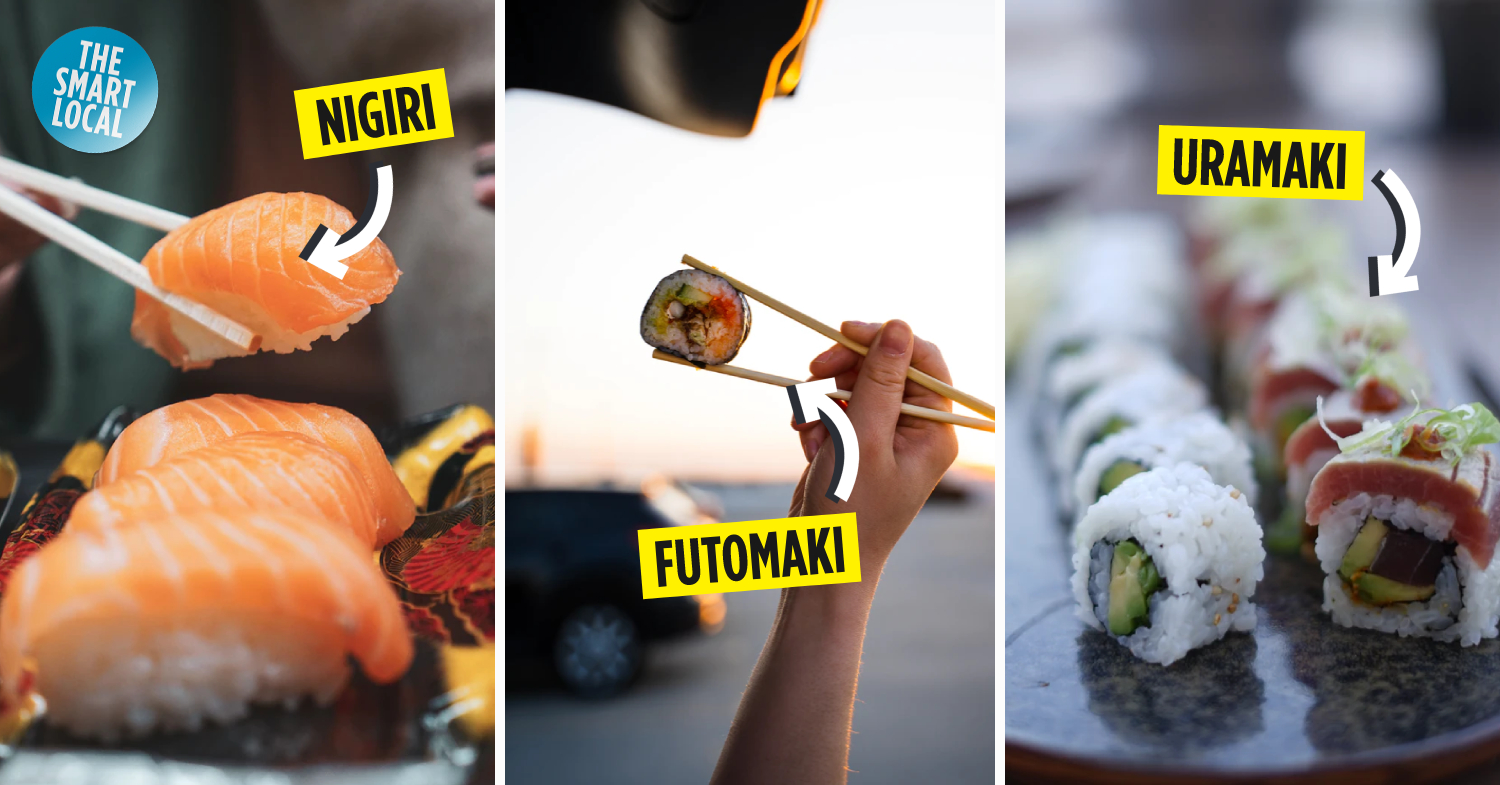
Easy sushi recipes
You don’t need to be a professional chef to make sushi. As long as you have a sushi mat, known as a makisu (巻き簾), and a pack of Japanese rice, you can make your own sushi spread at home. Here are 8 easy sushi recipes simple enough for you to try with your kids at home.
1. Shrimp mayonnaise futomaki
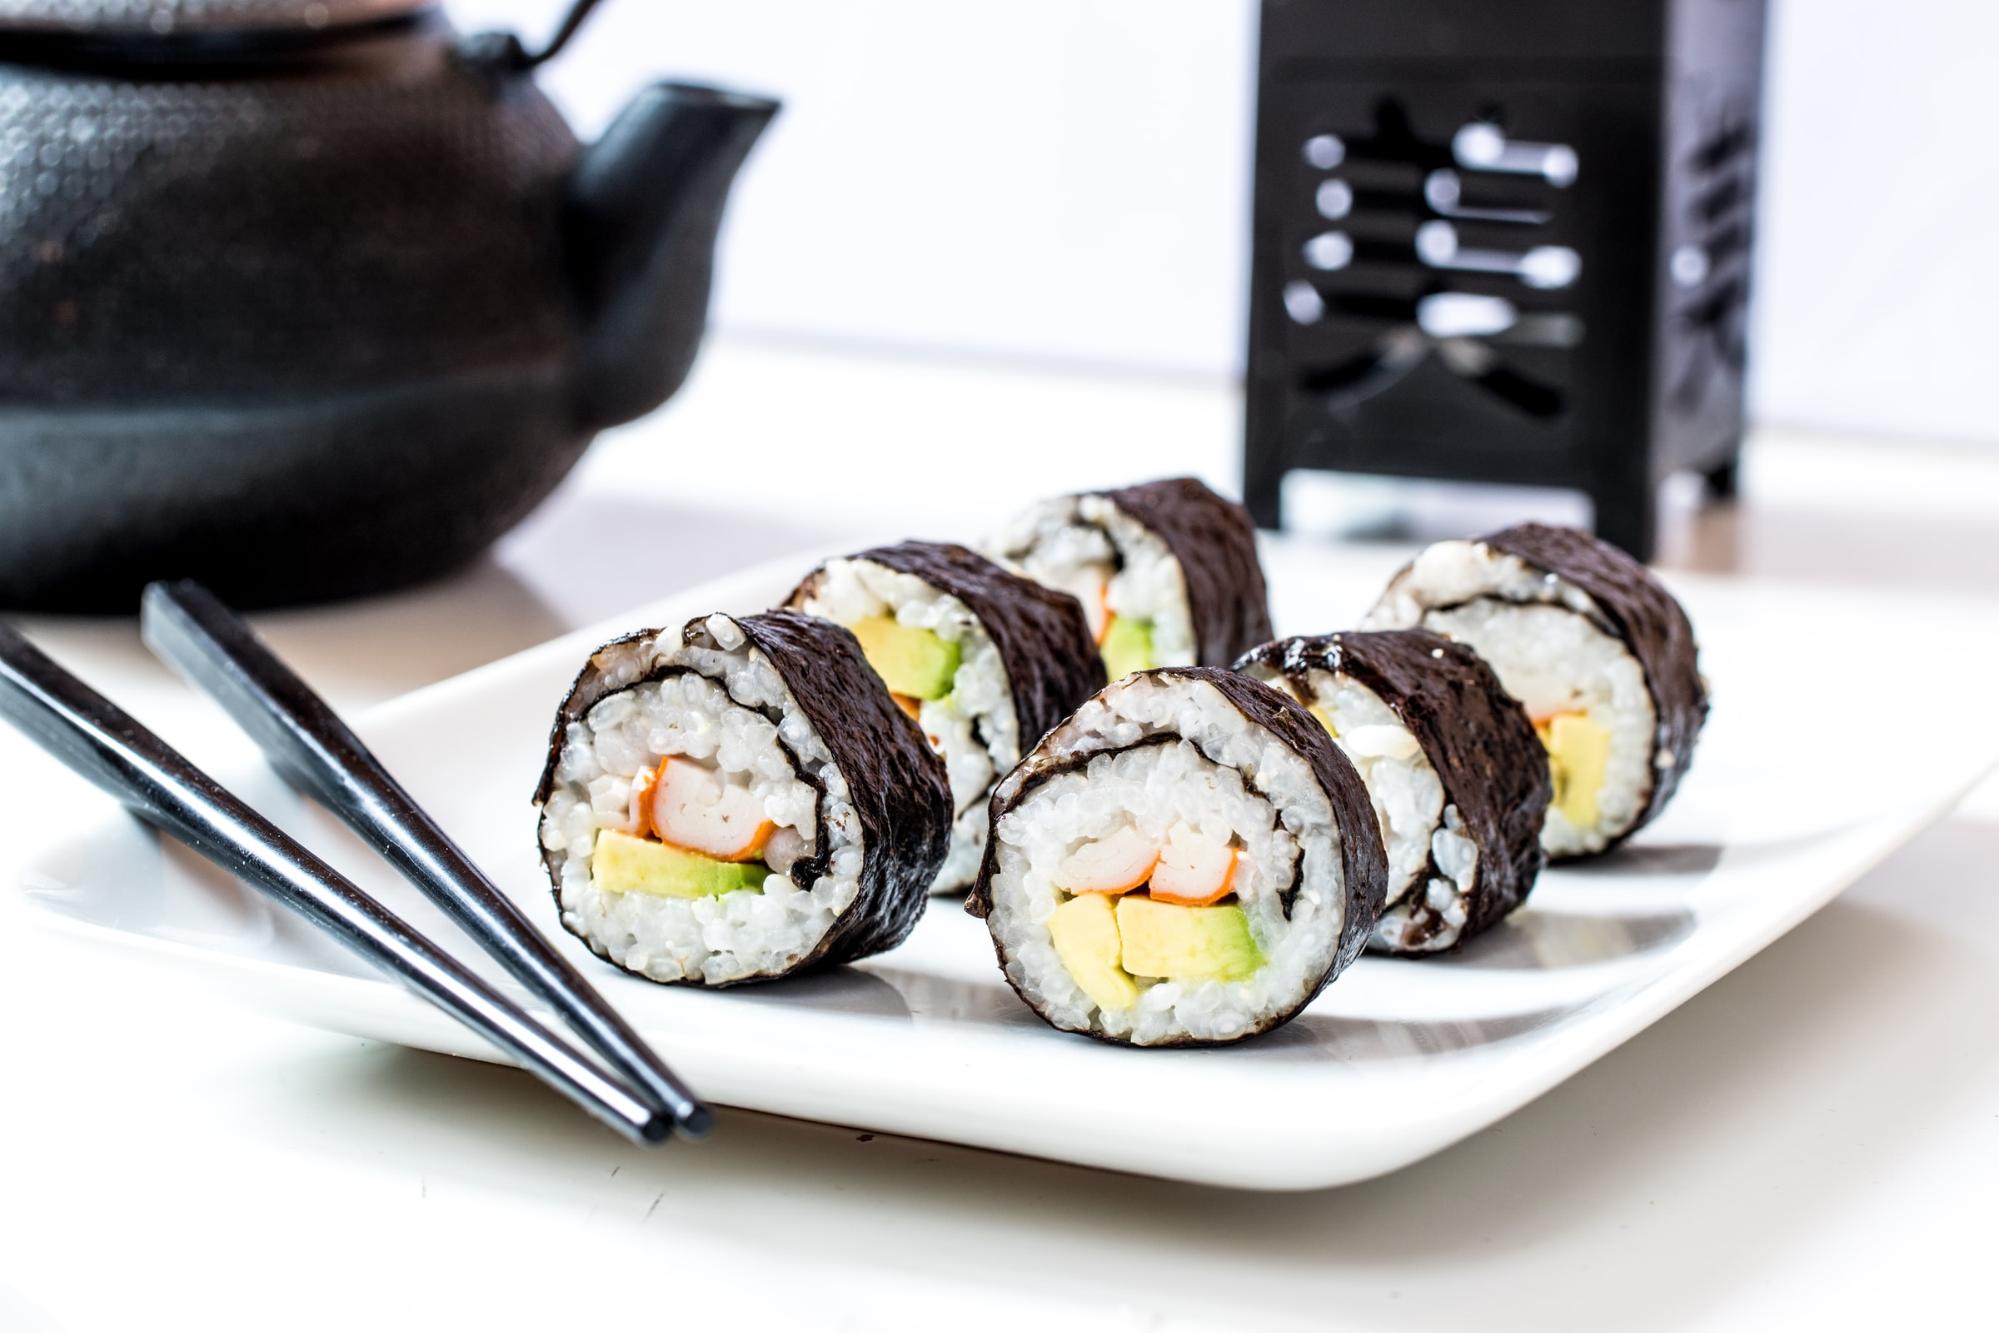
Image credit: martin becker
Hosomaki (細巻; thin roll) is a cylindrical rice roll with one type of filling, be it cucumber, crab meat, or egg. It originated from Kanto, and remains one of the most popular types of sushi to date.
If you decide to put more than one type of ingredient into your hosomaki, then the sushi is called a futomaki (太巻き), which literally means “fat roll”. The following recipe is for a shrimp mayonnaise futomaki, but you can replace the fillings as you like. For those without a makisu, you can use cling wrap instead.
Makes 14 rolls
Ingredients:
- Sushi rice
- 200g Japanese rice (makes about 400g cooked sushi rice)
- 1 5cm piece of kombu (kelp) (optional)
- 480ml water
- 1 ½ tbsp rice vinegar
- ½ tsp salt
- 1 ½ tbsp sugar
Filling and assembly
- 2 eggs
- ½ tbsp white dashi stock
- ½ tbsp water
- 1 tbsp water
- A pot of water
- A pinch of salt
- 6 shrimps, shelled and deveined
- 2 tbsp mayonnaise
- A dash of soy sauce
- ½ Japanese cucumber, cut lengthwise
- 2 pieces of nori seaweed
- 2 crab sticks
- A pot of water
- 2 tbsp Kewpie mayonnaise or normal mayonnaise
- 2 tbsp soy sauce (optional)
Steps:
Sushi rice
- In a rice pot, wash the rice repeatedly until the rice water becomes mostly clear. Then, add a piece of kombu if you want the rice to be more fragrant.
- Add water to the rice and cook it in an automatic rice cooker.
- While the cooked rice is hot, add rice vinegar, salt, and sugar to the rice. Using a spatula, gently mix the rice without flattening the grains. Cover the sushi rice with a wet towel and set it aside.
Filling
- Combine the eggs, white dashi stock, and sugar into a bowl and mix evenly.
- Pour half of the egg mixture into a pan over medium heat and fold it into a roll carefully when the egg is almost cooked through.
- On the empty side of the pan, pour the remaining mixture. When the egg is almost cooked, turn the existing egg roll over so that the new egg layer is folded over the previous layer.
- Cut the thick egg roll horizontally into 3 strips, then halve each strip lengthwise. You should get 6 egg strips in the end. Set aside for assembly later.
- In a pot of boiling water, add a pinch of salt and six shrimps. Boil the shrimps for two minutes and remove them from the water.
- On the cutting board, cut the shrimps into thumb-sized pieces.
- In a mixing bowl, mix the shrimp pieces with mayonnaise and soy sauce. Set aside for later use.
- Cut and discard the tips of the cucumber, then slice the cucumber into two strips. Make sure the strip spans the whole length of the nori seaweed.
Assembly
- Find a clean and flat surface and spread out your sushi roll mat or a piece of cling wrap. Place your nori seaweed piece on the mat.
- Spread the cooked rice around and cover ⅔ of the nori seaweed piece. Leave a 5mm gap on one side of the seaweed, and a 2cm gap on the other side. Ensure that the height of the rice is around 1cm, and remains consistent throughout.
- In the middle of the rice, place the cucumber strip. Then, place a crab stick, cut in half, directly above the cucumber strip.
- Add a strip of mayonnaise on the crab sticks and cucumber strips.
- Use one hand to hold the filling together while the other hand lifts one side of the sushi roll mat or cling wrap slowly. Fold over the filling.
- Once the first roll is made, use both hands to firmly squeeze the shape in place. Then, lift up the side of the mat or cling wrap and continue rolling the sushi roll until the whole nori seaweed is used up. Do a final squeeze to ensure the shape of the roll stays in place.
- Repeat steps #5-10 for the other sushi roll.
- Slice each sushi roll into seven pieces. Make sure your knife maintains a slicing motion as it cuts downwards without pressing down on the roll too hard. This prevents the filling from leaking out.
- Serve with soy sauce or any condiment of your choice.
Check out the original recipe here:
Video credit: Botan Dining Room
2. Uramaki
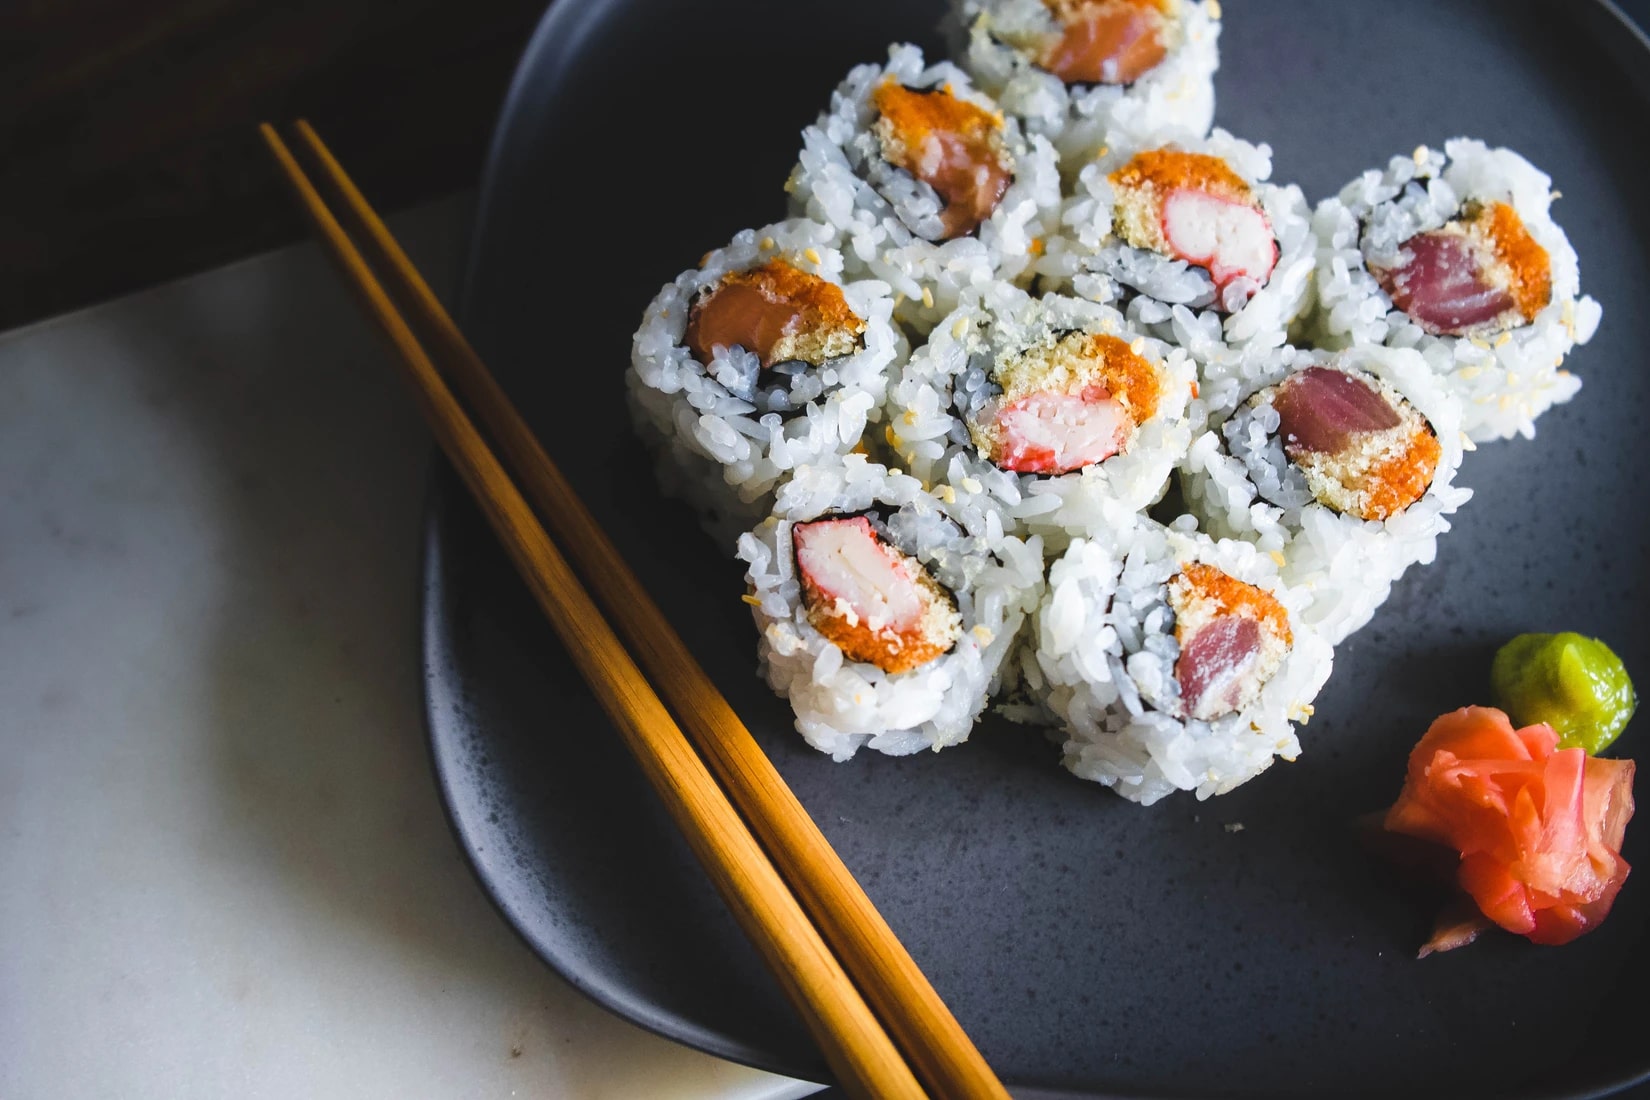
Image credit: Youjeen Cho
Uramaki (裏巻き) means “inside-out roll”. It’s basically inverted hosomaki or futomaki, in which the rice is wrapped around the nori seaweed instead.
Contrary to expectations, the sushi type was actually not invented in Japan – it hails from America instead. In Little Tokyo, which is a Los Angeles district with Japanese being the ethnic majority, there’s a restaurant called Tokyo Kaikan. One of its chefs, Machita Ichiro, created the inside-out roll as American customers weren’t a fan of the nori seaweed’s texture.
The ingredients in the following recipe can be substituted with those of your choice.
Makes 14
Ingredients:
- 2 pieces of nori seaweed
- 400g cooked sushi rice (refer to futomaki recipe)
- ½ Japanese cucumber, cut lengthwise then into strips (refer to futomaki recipe)
- 2 crab sticks, each cut in half
- 2 tbsp Kewpie mayonnaise or normal mayonnaise
- 3 tbsp ikura (salmon roe) (optional)
Steps:
- Place a cling wrap over the sushi roll mat. Then, place the nori seaweed.
- Spread the sushi rice evenly across the seaweed with a height of around 1.5cm. Leave a 1cm gap at the top and bottom sides.
- Turn the nori seaweed around such that the rice is facing the mat. Do the flipping swiftly to prevent the rice from dropping off.
- In the middle of the nori seaweed, place the cucumber strip and the crab stick. Then, add a strip of mayonnaise across the filling.
- Use one hand to hold the filling together while the other hand lifts one side of the sushi roll mat slowly. Bring it to fold over the filling.
- Once the first roll is made, use both hands to firmly squeeze the shape in place. Then, lift up the sushi mat and the cling wrap and continue rolling the sushi roll until the sushi roll is closed. Do a final squeeze to make sure the shape of the roll stays in place.
- Spread ikura across the sushi rice if desired. Reroll the sushi roll in the cling wrap to ensure that the ikura stays in place.
- Repeat steps 1 to 7 for the other roll.
- Wet the knife before slicing each roll into 7 pieces. After every slice, wipe off any rice that is stuck to the knife and rewet it before making the next slice. Serve.
Check out how the rolling of uramaki is done:
Video credit: よだれ飯
3. Salmon nigiri
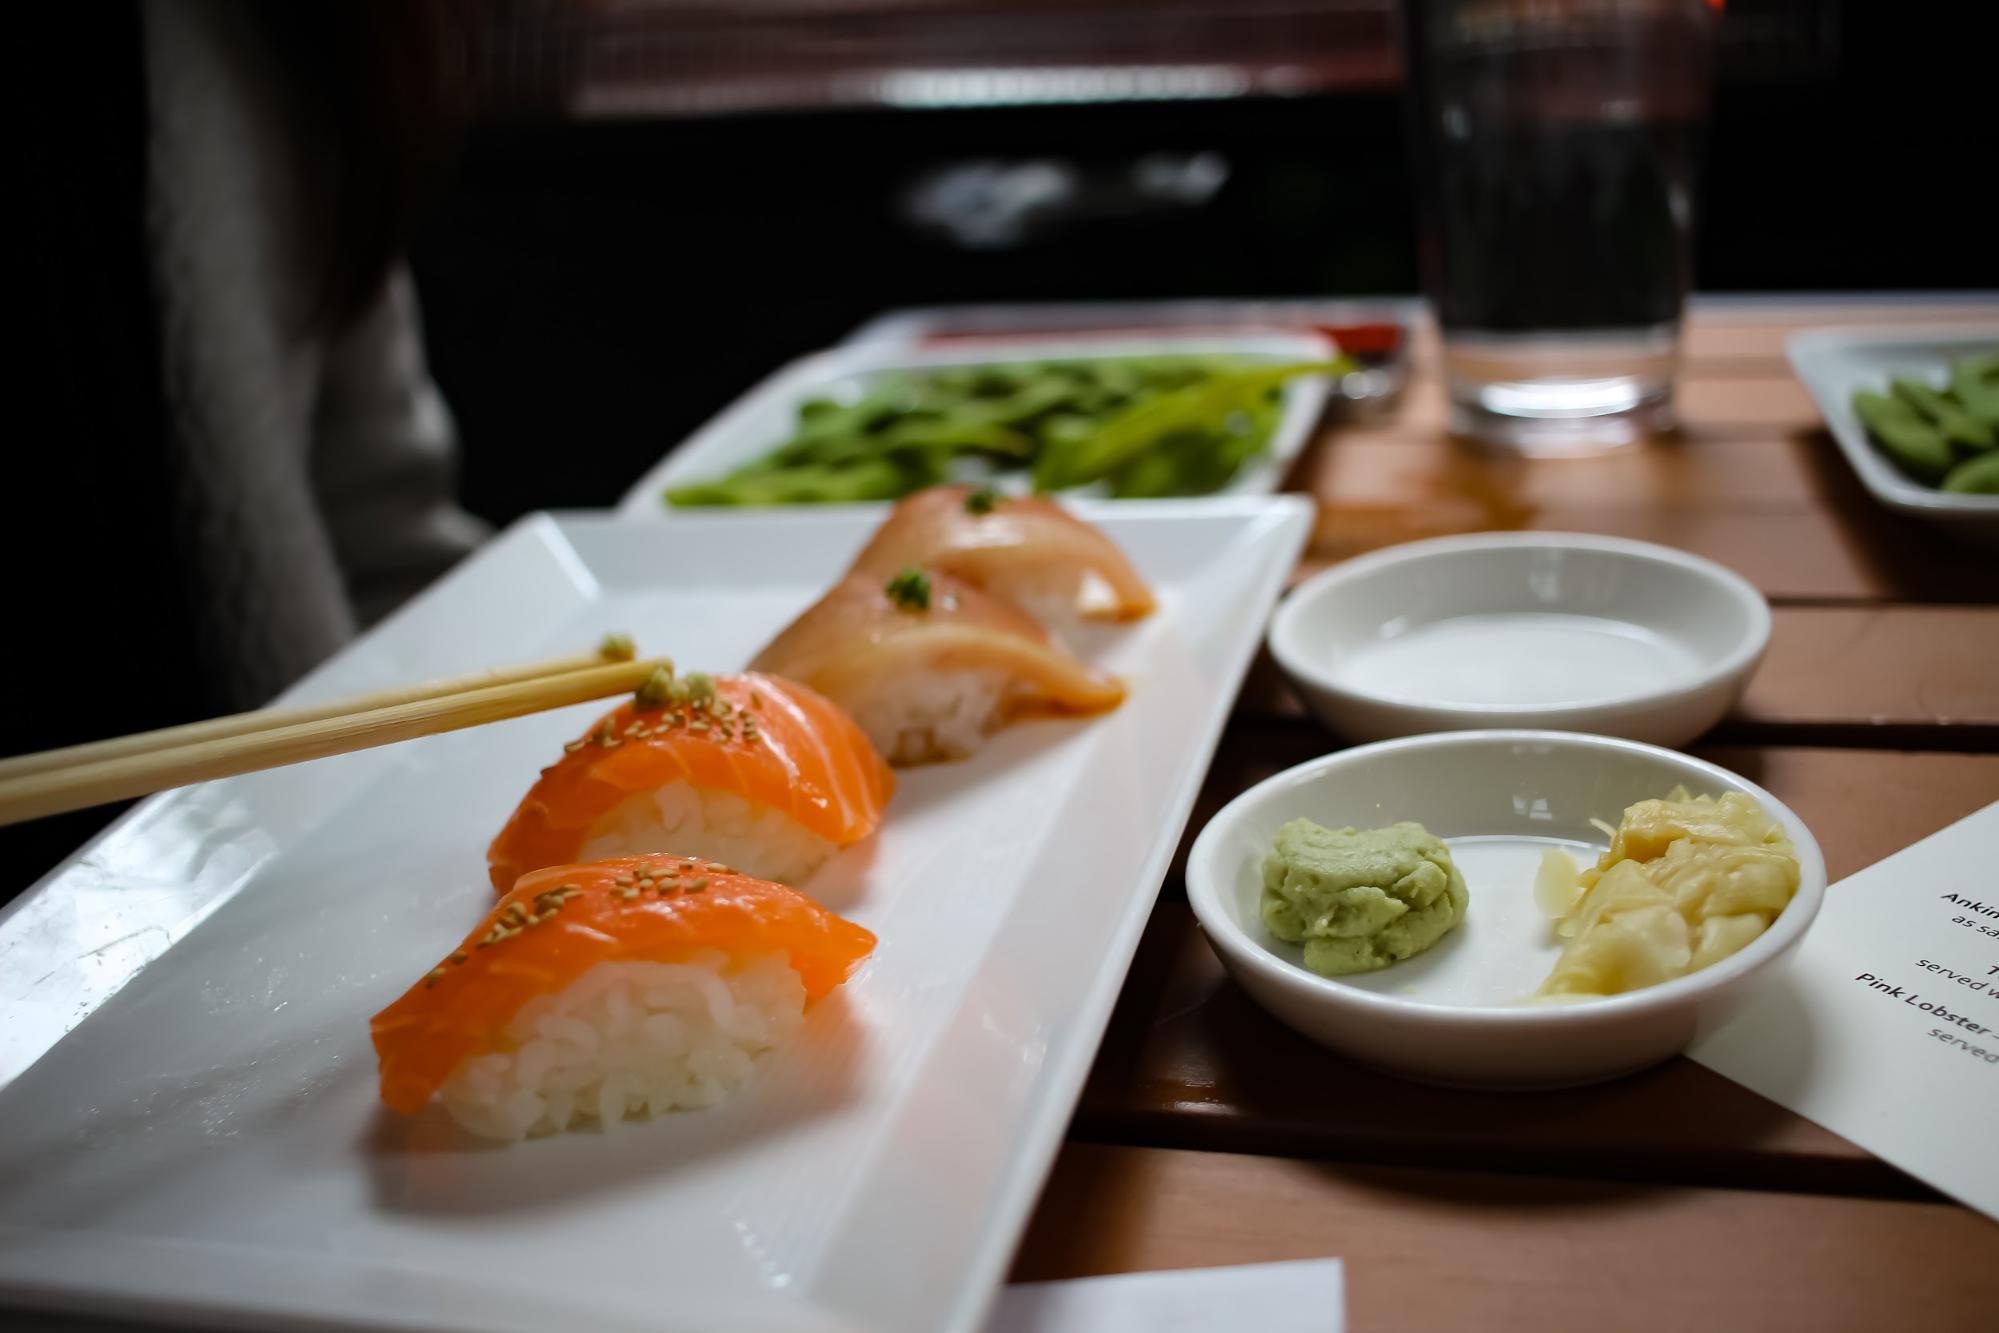
Image credit: Crystal Jo
Nigiri was created by a man called Hanaya Yohei in Edo during the 1820s. To the untrained eye, the sushi simply appears to be a piece of sashimi draped over a ball of rice. However, the art of pressing the nigiri into the right shape, consistency, and temperature actually takes years of practice to reach a professional level.
Of course, you don’t have to master the technique to make yourself a delectable plate of sushi.
The tutorial will break down how a salmon nigiri is made. Be patient, and you’ll get the hang of it soon.
Makes 16
Ingredients:
- 300g sushi-grade salmon
- 400g cooked sushi rice (refer to futomaki recipe)
- 1 tbsp wasabi
- 1 tbsp soy sauce (optional)
Steps:
- Angle the knife at about 45°and cut the salmon into thin 5mm slices.
- Separate the sushi rice into 16 even portions.
- Hold the salmon piece on the base of your fingers. Then, dab a bit of wasabi in the centre of the salmon piece.
- Place 1 rice portion in the centre of the salmon piece. Using the thumb of the hand holding the sushi, press a hole in the centre of the rice. Meanwhile, use the index finger and thumb of the free hand to squeeze the rice.
- Use the index and middle finger free hand to press down on the rice. Concurrently, curl the fingers of the hand holding the sushi such that the rice forms an elongated shape.
- Turn the nigiri around. Then, using the index finger and thumb of the free hand, repeatedly squeeze the sides. Rotate the sushi around to make sure even pressure is applied to all parts of the sushi.
- While doing so, use the thumb of the hand holding the sushi to press the tip of the rice into a slanted angle such that the base of the rice portion is smaller than the top.
- Serve with soy sauce or any condiments of your choice.
Watch how the nigiri is assembled:
Video credit: 大将寿司屋の
4. Salmon roe gunkan maki
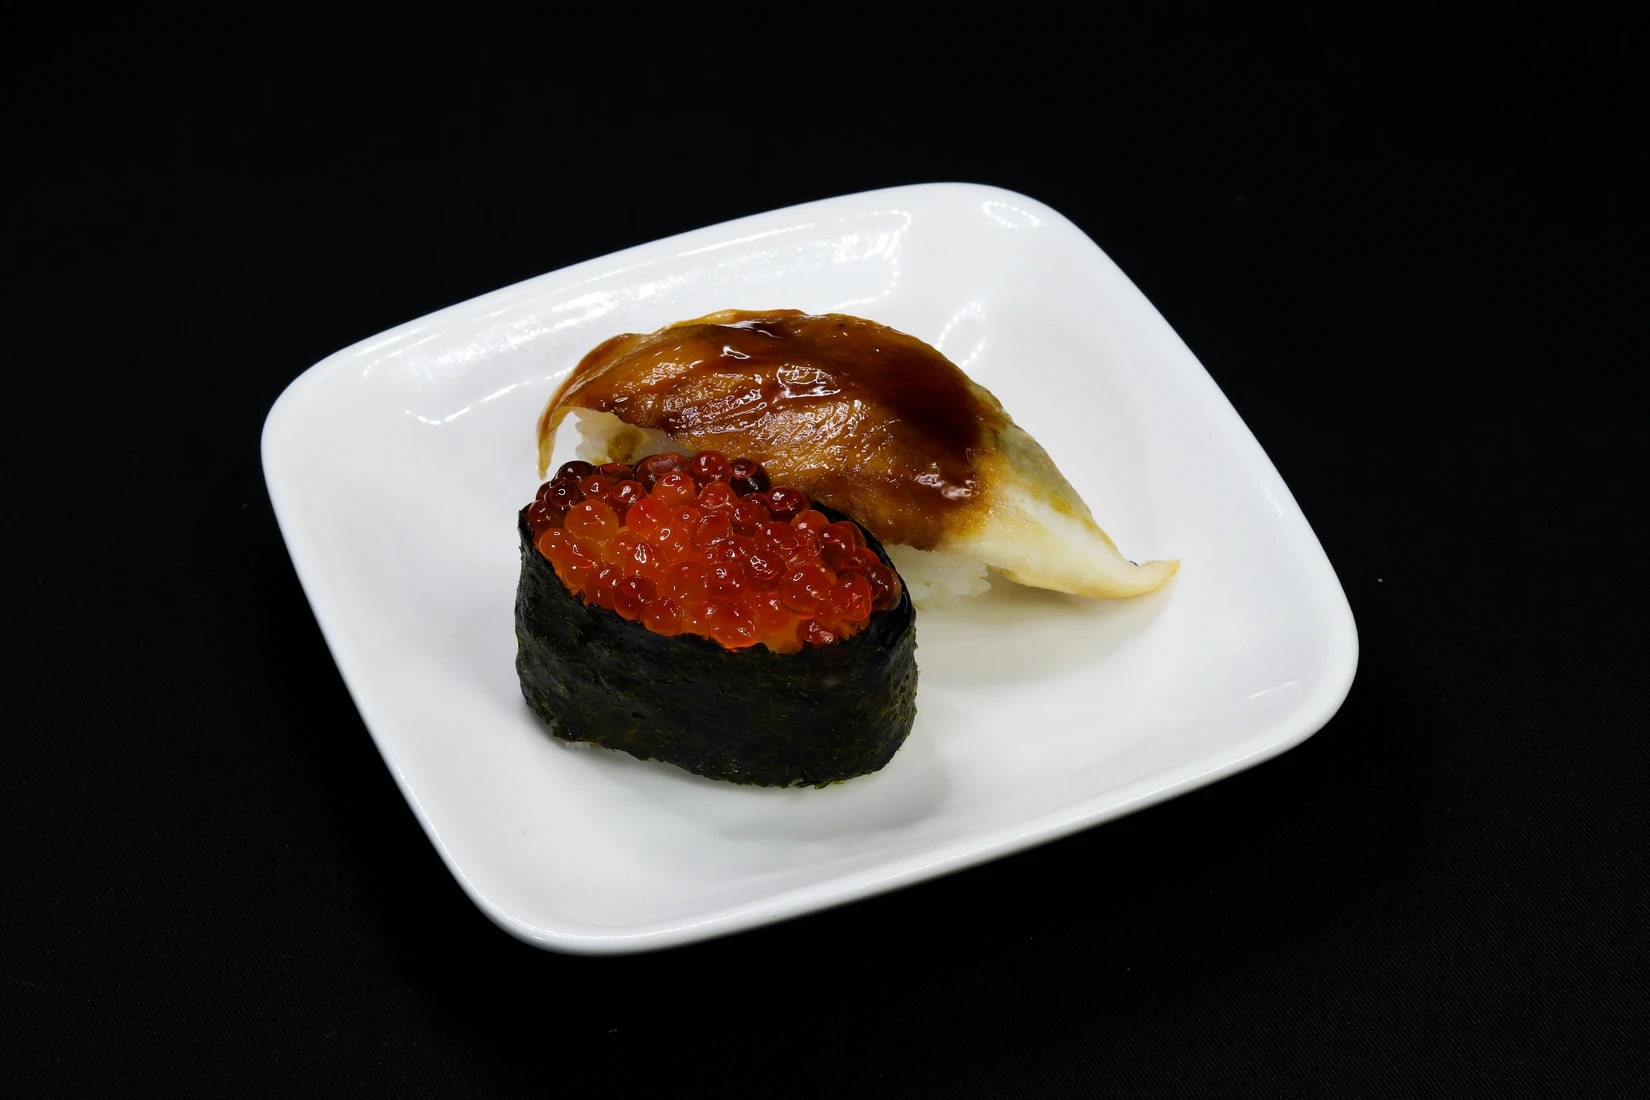
Salmon roe gunkan sushi with a nigiri at the side
Image credit: FLY:D
Gunkan was invented by Ginza Kyubey, a famous historical sushi restaurant, in 1941. Its kanji name “軍艦” directly translates to “war boat”, and it’s not hard to see why as the appearance of the sushi literally resembles a ship filled with cargo. In other words, the gunkan is a type of sushi which has a piece of seaweed wrapped loosely around its filling.
The following recipe uses ikura as topping, but you can choose any kind of topping and sauce of your choice.
Makes 16
Ingredients:
- 400g cooked sushi rice (refer to futomaki recipe)
- 3 pieces of nori seaweed
- 200g ikura
Steps:
- Separate the rice into 16 even portions. Use your fingers and shape them into rectangular blocks with rounded edges. Remember to constantly wet your fingers while doing so to prevent the rice from sticking to your hands.
- Layer the 3 pieces of nori seaweed together and cut in half. Then, layer all the pieces together again and cut into 3. You should end up with 18 strips of nori seaweed, in which 16 will be used for this recipe.
- Wrap the strip of seaweed around the rice ball. Then, add ikura on top of the rice until the top of the sushi is covered.
- Repeat steps 1 to 3 for all other gunkan sushi. Serve.
Watch to see how gunkan maki is assembled:
https://www.youtube.com/watch?v=gbea788fyZs
Video credit: 大将寿司屋の
5. Mackerel pressed sushi
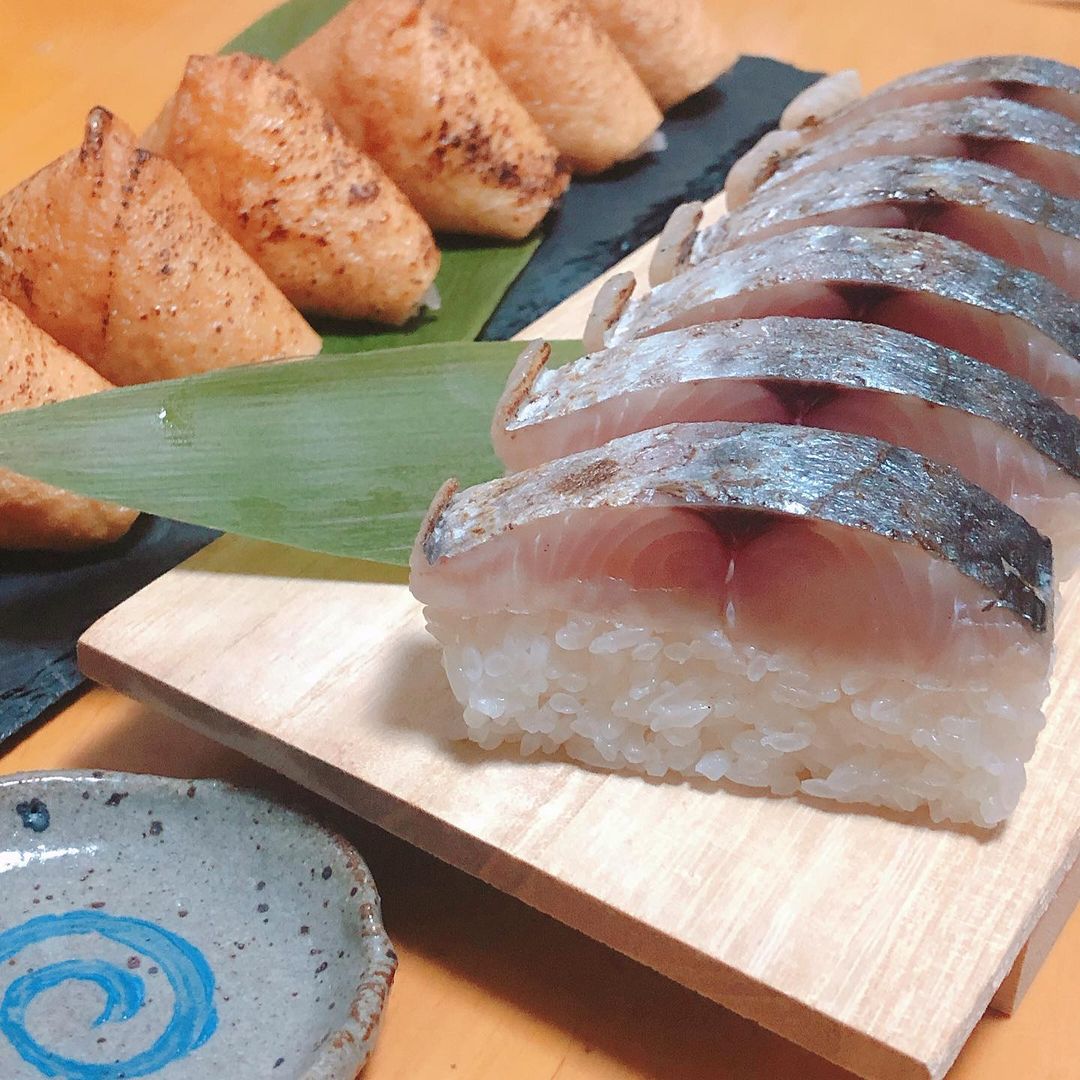
Image credit: @yuki7718
Originating from the Kansai region of Osaka about 400 years ago, oshizushi (押し寿司) means “pressed sushi”. It is made with an oshibako – a wooden or plastic mould that helps you shape the sushi into a defined, rectangular block.
The mackerel in the following recipe can be substituted with other types of fish, such as salmon.
Makes 10
Ingredients:
- 400g sushi rice (refer to futomaki recipe)
- 1 avocado
- 2 shimesaba (vinegar marinated mackerel) fillets
- 2 tsp wasabi (optional)
Steps:
- Line a piece of cling wrap at the base of the oshibako and leave enough cling wrap to wrap over the top layer of the sushi roll later on.
- Add a layer of sushi rice to the mold until it almost reaches the top, with a gap of about 1cm to spare.
- Using half an avocado, make 8 even incisions across the fruit and use a spoon to scoop out the slices. Line the avocado slices on top of the mackerel and ensure that the whole layer is covered.
- Even off the thickness of the shimesaba fillets by slicing off the thicker portion in the middle. You may dab some wasabi across the fillet for more flavour – do it on 1 side only.
- Place the fillet on top of the avocado, with the wasabi side facing downwards.
- Cover the top layer with the cling wrap and press the sushi roll using the lid of the oshibako. Be sure to do it slowly but firmly, while ensuring that even pressure is applied across the sushi roll.
- Remove the pressed sushi roll carefully from the mould and slice it into 5 individual pieces of sushi using a sharp knife. Be sure to wet the knife constantly and wipe off any stuck rice grains before proceeding into the next slice.
- Repeat steps 1 to 7 for the other sushi roll. Serve.
Watch how oshizushi is made:
Video credit: アラフォー独身派遣社員女の気ままな生活
Note: If you can’t get an oshibako, you may manually shape the sushi roll into a rectangular block with your hands and cling wrap. However, the shape will be less defined.
6. Inari sushi
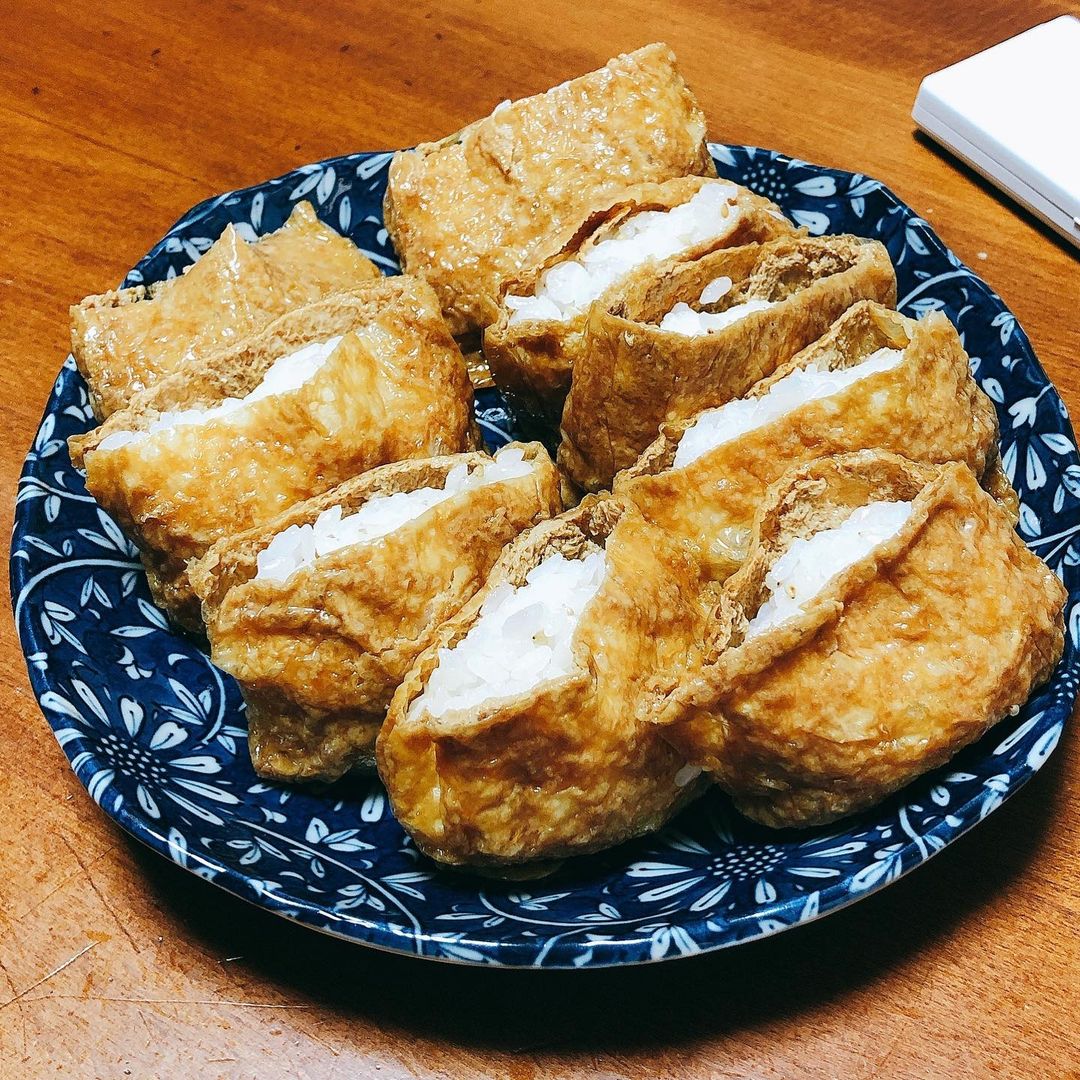
Image credit: yonkyu4949
Sushi usually takes the form of rice wrapped in seaweed. But for the inari sushi, the rice is wrapped in deep-fried tofu pockets.
For the following recipe, you can freely change up the ingredients and pack the fried tofu packets with whatever you like.
Makes 12
Ingredients:
- 80g carrot
- 100ml water
- 35g shiitake mushrooms
- ½ tsp soy sauce
- ½ tsp sugar
- 400g cooked sushi rice
- 12 fried tofu bags
Steps:
- Dice the carrot into about 5mm cubes. Add the carrot cubes into a pot of 100ml water. Heat over low flame.
- After about 30 seconds, add chopped shiitake mushrooms. Cover with the lid and cook for 10 minutes over low heat.
- Add soy sauce and sugar into the mix and stir well.
- Remove ⅓ of the sushi rice portion and place in a separate bowl.
- In the original bowl, add the cooked mix and mix gently until the sushi rice and ingredients are combined.
- Fill up the bean curd bags with either the plain sushi rice or the flavoured sushi rice. You can plate the sushi in alternating orientations, with some sushi facing downwards.
Check out the original recipe here:
https://www.youtube.com/watch?v=bb9BjifFbCA
Video credit: Hearty
7. Kakinoha-zushi
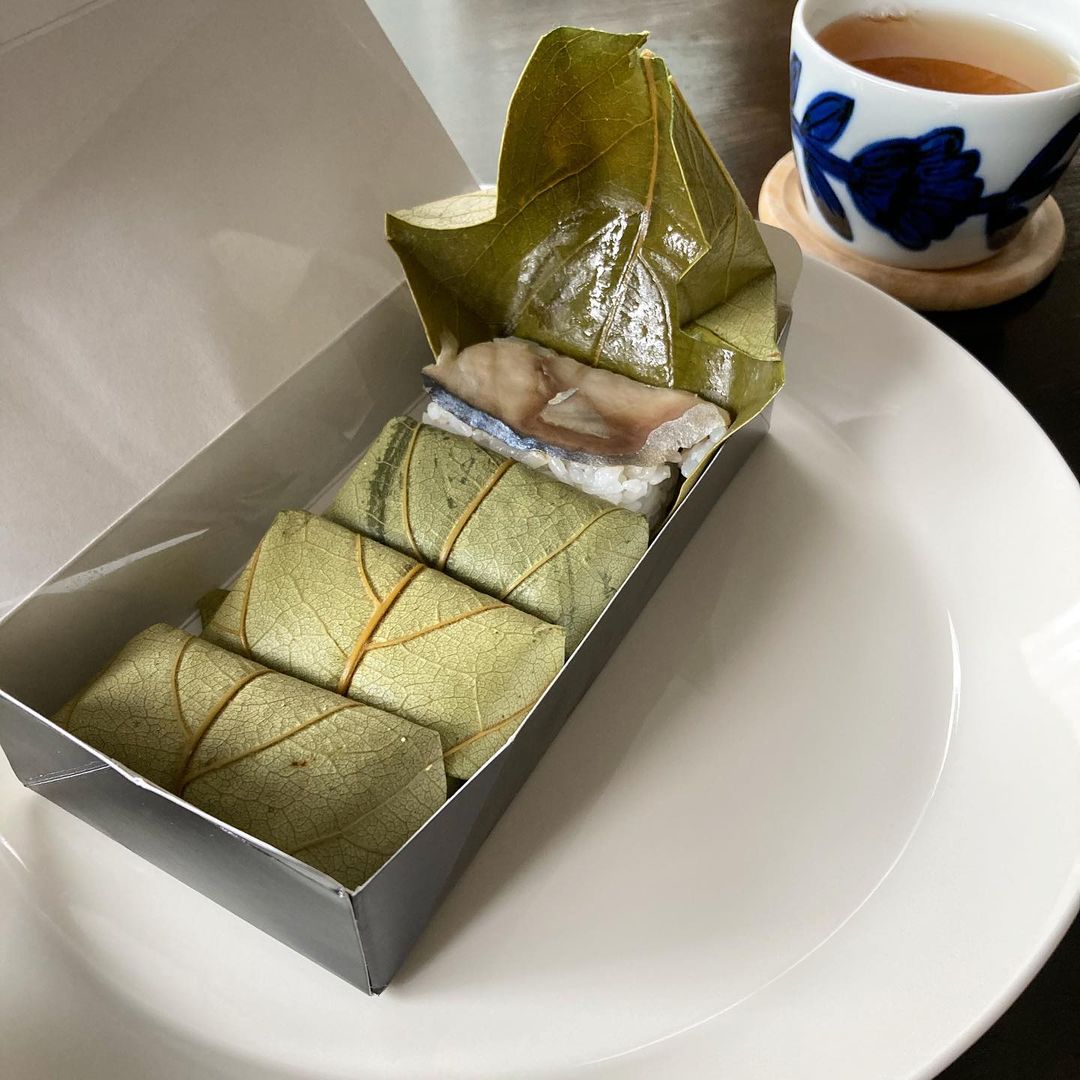
Image credit: @mammam0309
Kakinoha-zushi is a special traditional sushi from Nara. It consists of fish and rice wrapped together in a Japanese persimmon leaf. As the persimmon leaf contains an organic substance called tannin, which has preservative properties, the sushi can be kept for days at room temperature without going bad.
The following recipe uses the most common fish type for kakinoha-zushi, which is the saba.
Makes 15
Ingredients:
- 15 Japanese persimmon leaves
- 225g uncooked Japanese rice, cleaned and soaked in water for at least 30 minutes
- 550ml water
- 100ml sushi vinegar
- 2 shimesaba fillet
Steps:
- Wash the persimmon leaves and dab dry the leaves with kitchen towels.
- In a pot of rice, add water and cook in an automatic rice cooker.
- Mix in sushi vinegar to the cooked rice to make sushi rice without flattening the grains
- Angle the knife at about 45°and cut the shimesaba fillet into thin 5mm slices.
- Shape the rice into 15 even rectangular blocks measuring about 2.5cm x 4.5cm. Constantly wet your hands to prevent the rice from sticking.
- Using one hand to hold the permission leaf, place a fillet slice and layer a rice block over. Then, take the 2 pointed ends of the leaf and fold over the sushi. Place faced down so the sushi remains folded.
- Repeat step 6 for all other sushi until all rice blocks are used up.
- Serve immediately. Alternatively, place all the sushi in a tub with a lid pressing down on them, then put a weight on top. Leave the sushi to soak in the mild permission fragrance for 30 minutes before serving.
Check out the original recipe here.
8. Temaki
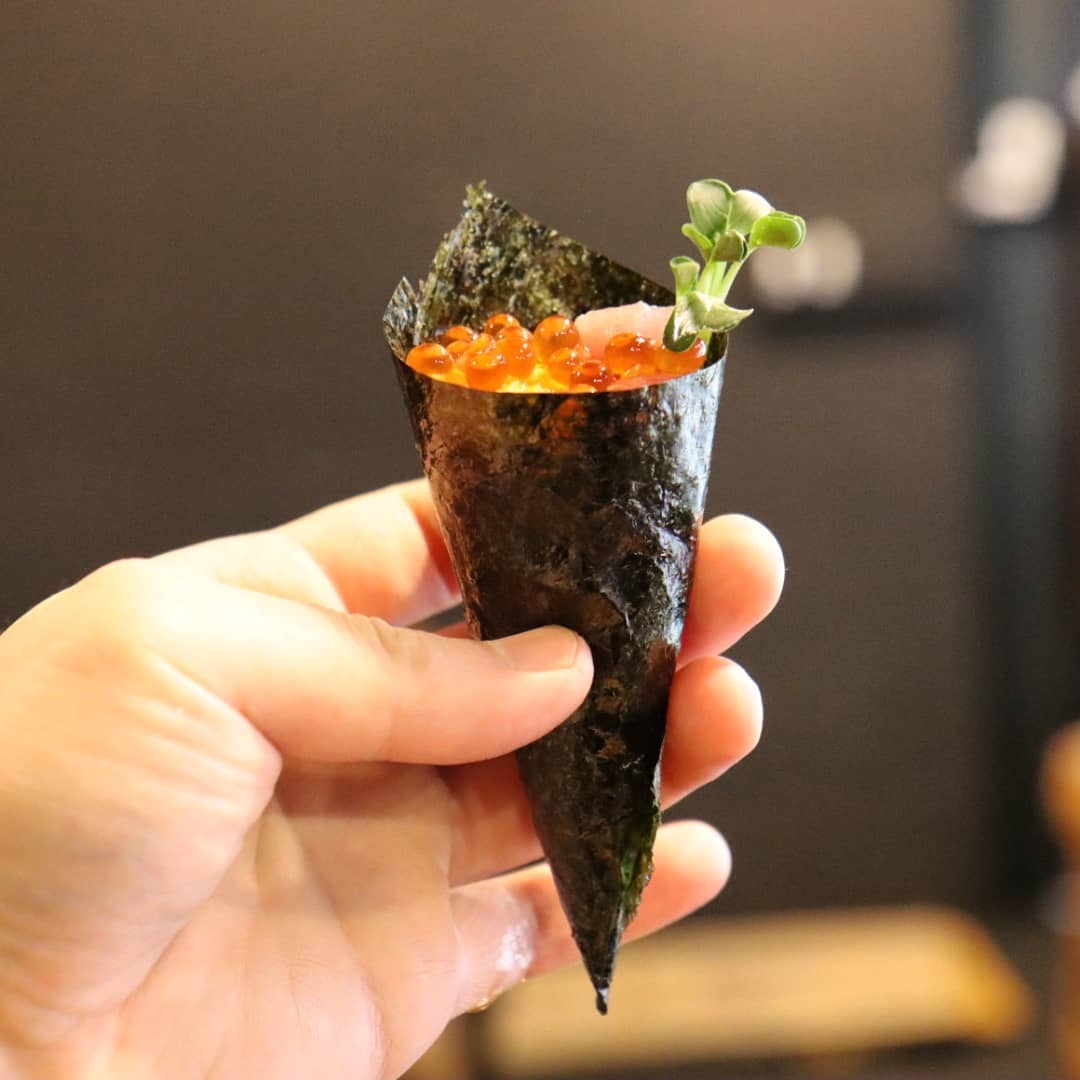
Image credit: @oh.jaesung
Temaki (手巻き) is known as sushi hand rolls. It has a cone shape that allows the user to hold it easily. The following recipe makes smaller temaki, though you can use bigger sheets of nori seaweed to make larger ones that will fill your stomach.
Makes 20
Ingredients:
- 6 okra
- A pinch of salt
- 400ml water
- 2 Japanese cucumbers
- 1 avocado
- 1 salmon fillet, about 100g
- 5 pieces of nori seaweed
- 400g cooked sushi rice (refer to futomaki recipe)
Steps:
- Sprinkle salt over the okra and boil in a pot of water for 2 minutes. Then, chop off the hard stem of the okra and slice off any coarse outer layer near the stem with a small knife. Finally, cut the okra into half.
- Chop off the tips of the cucumber and cut in half. Then, cut each piece in half lengthwise to get short cucumber strips.
- Cut the avocado in half. Remove the avocado skin and seed and chop into bite-sized pieces by cutting each half into 2 vertically, then making 3 incisions evenly across.
- Angle the knife at about 45°and cut the salmon into thin 5mm slices.
- Stack the 5 pieces of nori seaweed together and cut into smaller quarter squares.
- To make a temaki, hold the seaweed piece on 1 hand and add a layer of rice. Then, add the salmon slice, avocado, cucumber, and okra to the centre of the rice layer. Roll up the seaweed into a cone shape. Eat immediately or plate many temaki together and serve. Ensure the unsealed flap is pressed against the plate so the temaki does not fall apart.
Check out the original recipe here:
https://www.youtube.com/watch?v=OR_rzYLymGk
Video credit: W Strings
Easy sushi recipes to try at home
Making sushi is a fun activity to do with your friends and family without fearing that the kitchen will be left in shambles. Try out these sushi recipes and treat yourself to the delightful rice rolls.
For more articles, check out:
- Bamboo shoot recipes to try during spring
- Summer anime to watch in 2021
- Things to do in Japan during summer
- Coffee jelly recipes to try at home
- Cute bento boxes and how to make them
Cover image adapted from: Helga Christina, Lana Mattice and Valentin B. Kremer
